
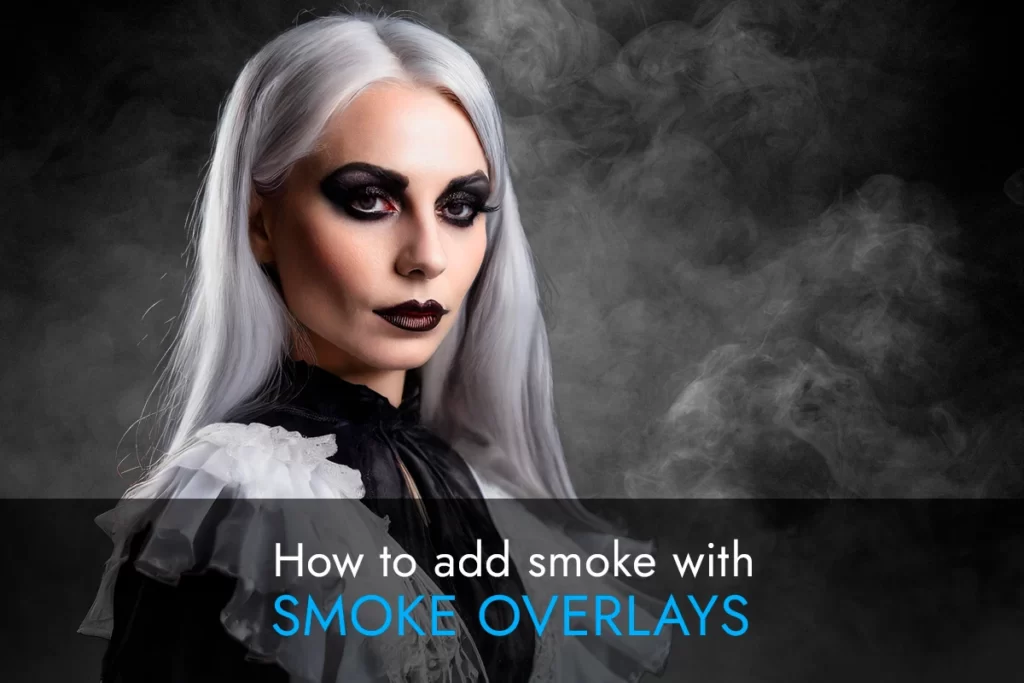
Want to learn how to add smoke in Photoshop to your artwork, photography and design but don’t know where to start? Here I will reveal and show you the 4 possible techniques you can use to create the perfect atmosphere in Photoshop and how to choose the best option for your intention and how to achieve them easily.
What are the best ways to add smoke?:
- Use Smoke brushes
- Use Smoke overlays
- Create your own smoke with photoshop
How to add smoke in photoshop with smoke brushes?
1 step: Get smoke brushes and import brushes into Photoshop
Get free smoke brushes, or get premium brushes for maximum quality and download them to your device.
Download smoke brush for free (Smoke brush free download, coffee jpeg and project photoshop)

After downloading the brushe to your device, import it into Photoshop.
- Select Brush tool
- Select Brush tool menu
- Select Brush tool settings
- Import Brush in .ARB format
2 step: Choose right brush and pick colour
Mark the suitable brush and choose the colour that will fit the smoke from the mug. For the demonstration we will use our free overlay, but if you would like a choice you can use the premium brushes.
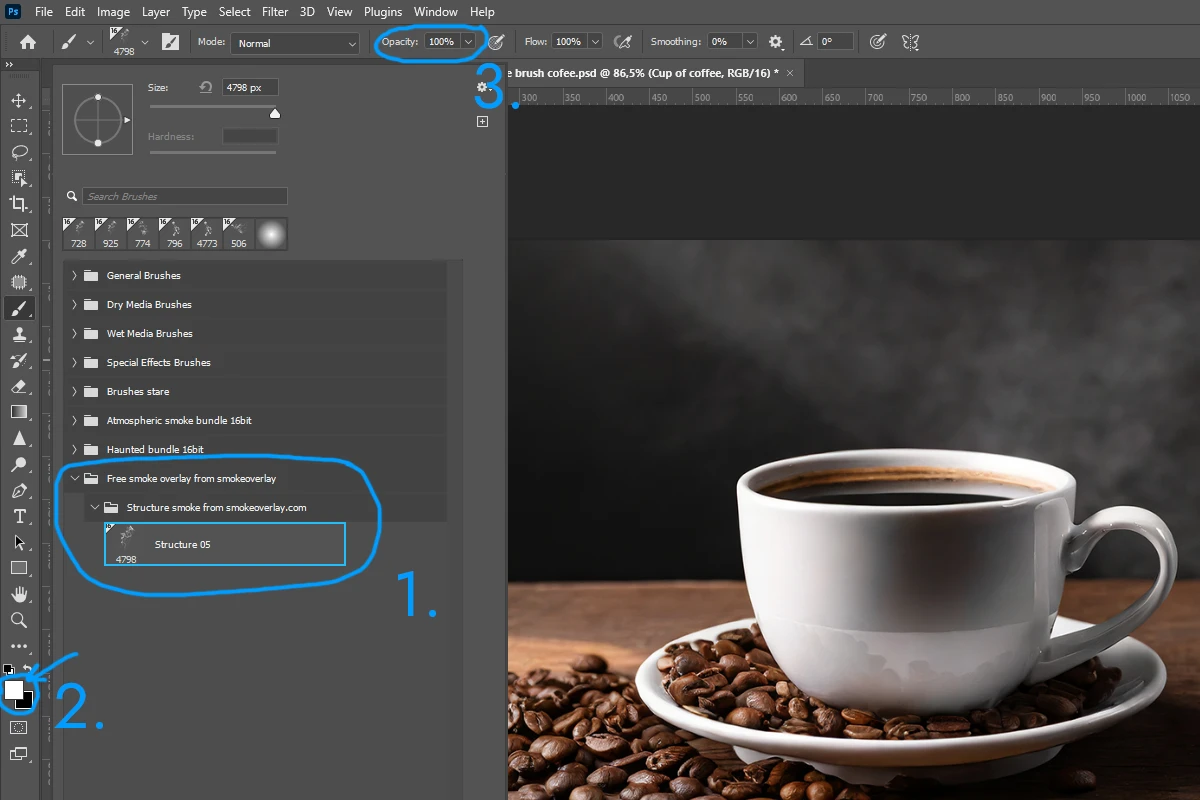
- In Brush tool menu select your brush
- Take white color for active brush
- Check if you have 100% opacity of the brush
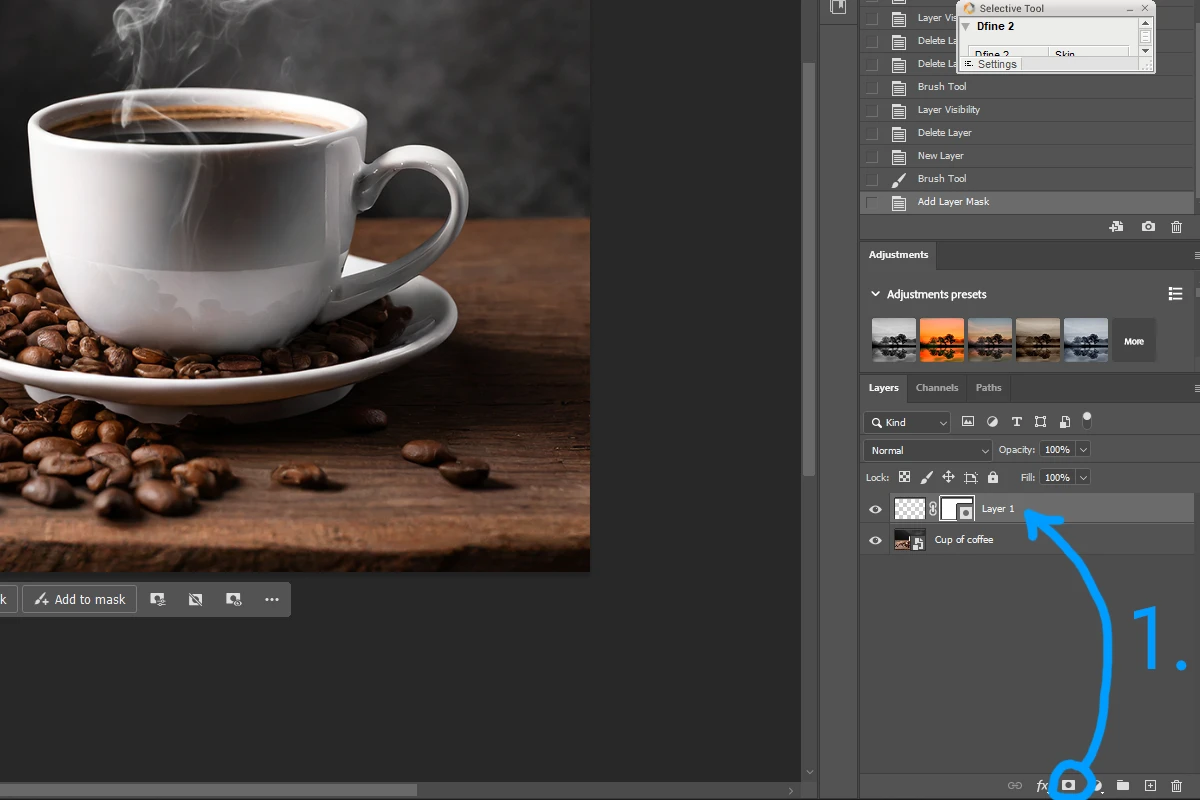
3 step: Create new layer and use a brush
In this step, we create a new empty layer to paint on with the brush. We won’t paint directly into the photo itself, because we want to be able to edit the smoke on the layer afterwards.
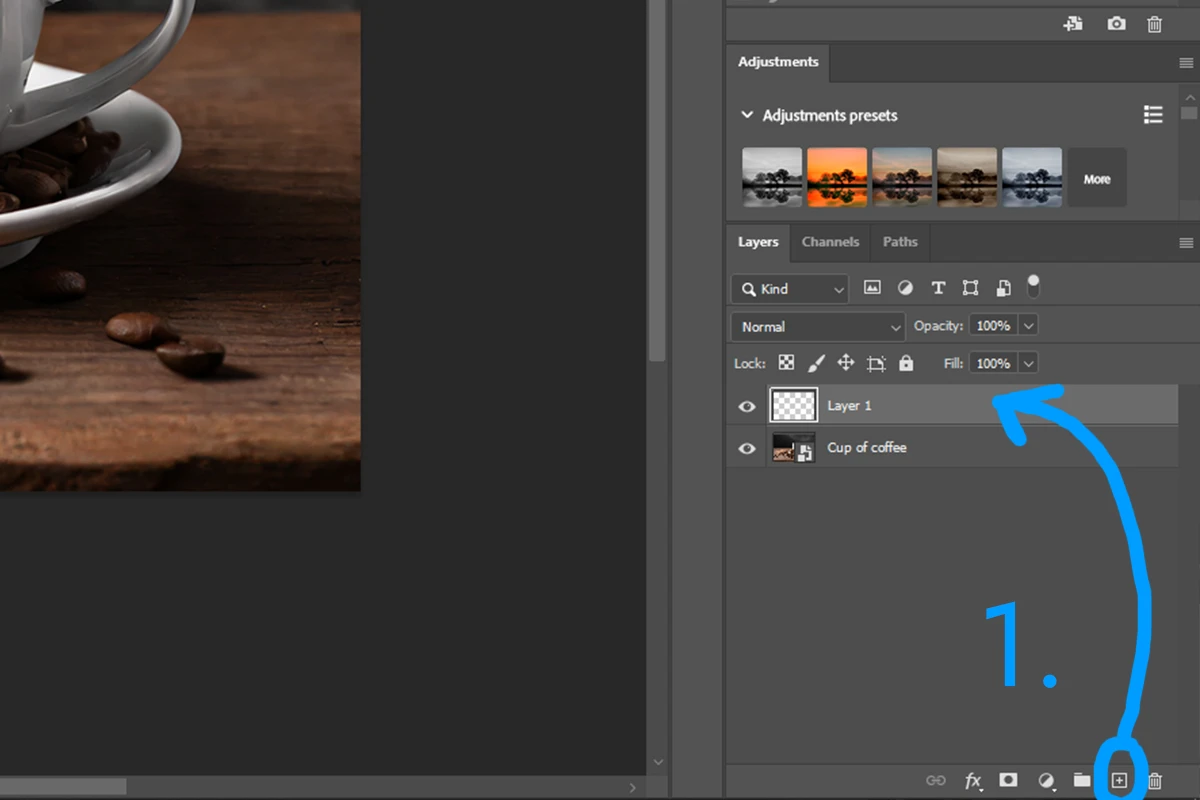
- Create new blank layer
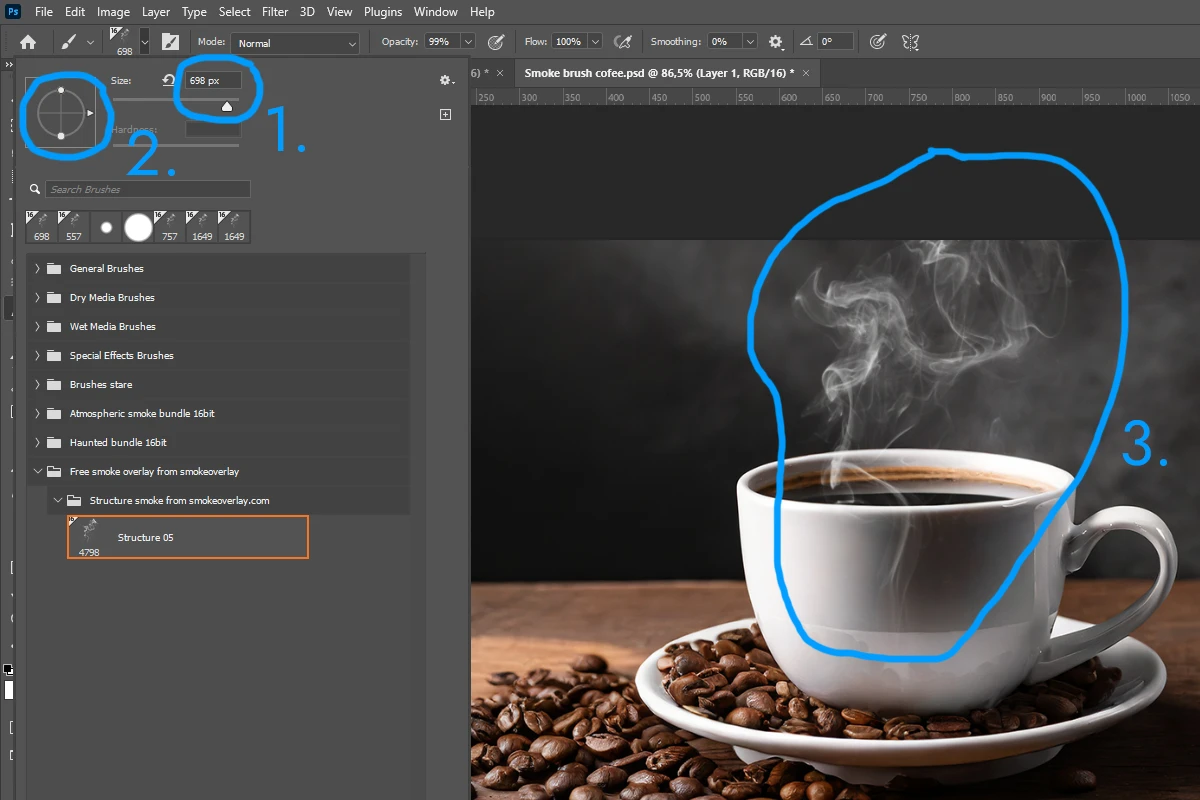
In this step we use the brush itself, so that it fits the photo as well as possible and we don’t mind if the bit of smoke doesn’t fit exactly (We mask that part later)
- Resize your brush in brush tool menu
- You can rotate brush with click if you need
4 step: Adjust the smoke layer
In this part, adjust the overlapping smoke on the cup so that it looks realistic. To do this, we’ll create a mask layer that allows us to hide certain parts of the smoke layer.
- Add to layer with smoke new mask
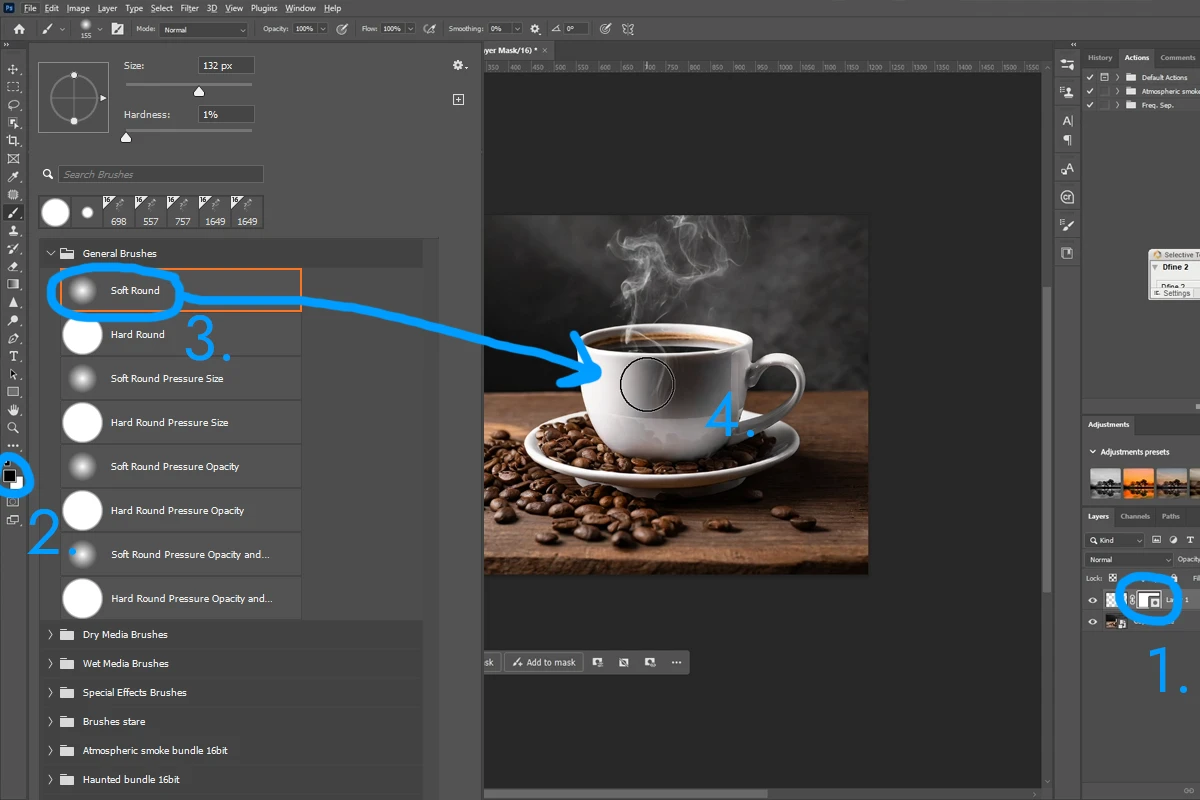
- Make sure you have the smoke layer mask on
- Choose black colour
- Find an ordinary round brush with soft edges in the brush menu
- And because we have the black paint and mask selected, the places where we use this brush will hide the smoke layer.

- Change layer opacity to your preference
At this point it’s possible to make further adjustments, in some situations it’s useful to use multiple layers and blur some with Gaussian blur to add depth to the photo. In another situation, for example, you can use a layer transformation to alter the shape.
In this case, though, we really only needed to use the brush itself and mask out some of the smoke, and we’ll show more examples in a more detailed tutorial.
5 step: Enjoy your result
And here we have a beautiful result that looks natural and in a few moments we added to the atmosphere of the photo thanks to the smoke that creates the impression of hot coffee.
For these situations where we need to add smoke quickly, smoke brushes are perfect for us, as they can be placed exactly where we need them.


How to add smoke in Photoshop with smoke overlays?
We’ve seen the Smoke Brush and now we’re going to look at the power of smoke overlays that offer us exclusive quality (In the case of quality overlays, we mean resolution and professional processing). Premium overlays reach up to 8800px (on the longer side), and you can download 5 Free smoke overlays for free!
1 step: Get quality smoke overlay and prepare your photography
Get free smoke overlays, or get premium overlays for best results or download smoke overlays for free
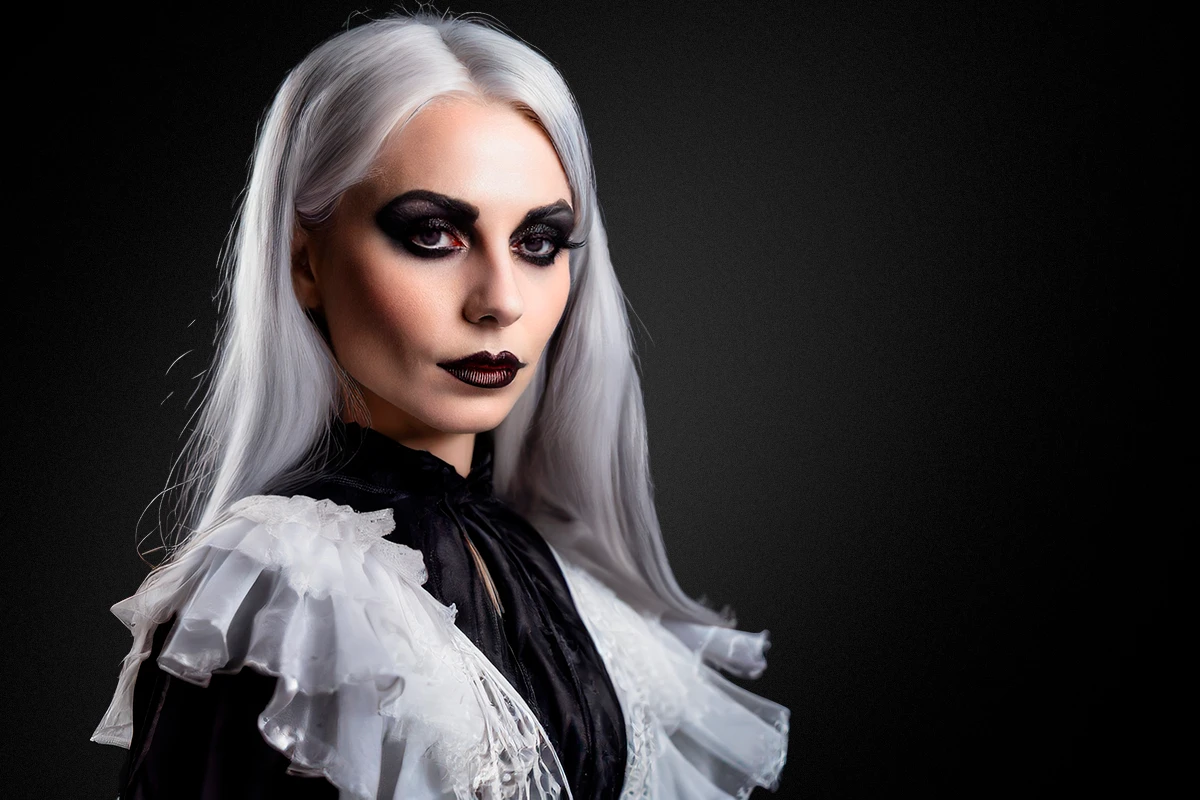
In this tutorial, we’ll show you how to prepare a photo with a model where we insert smoke in front of and behind her to enhance the mysterious atmosphere.
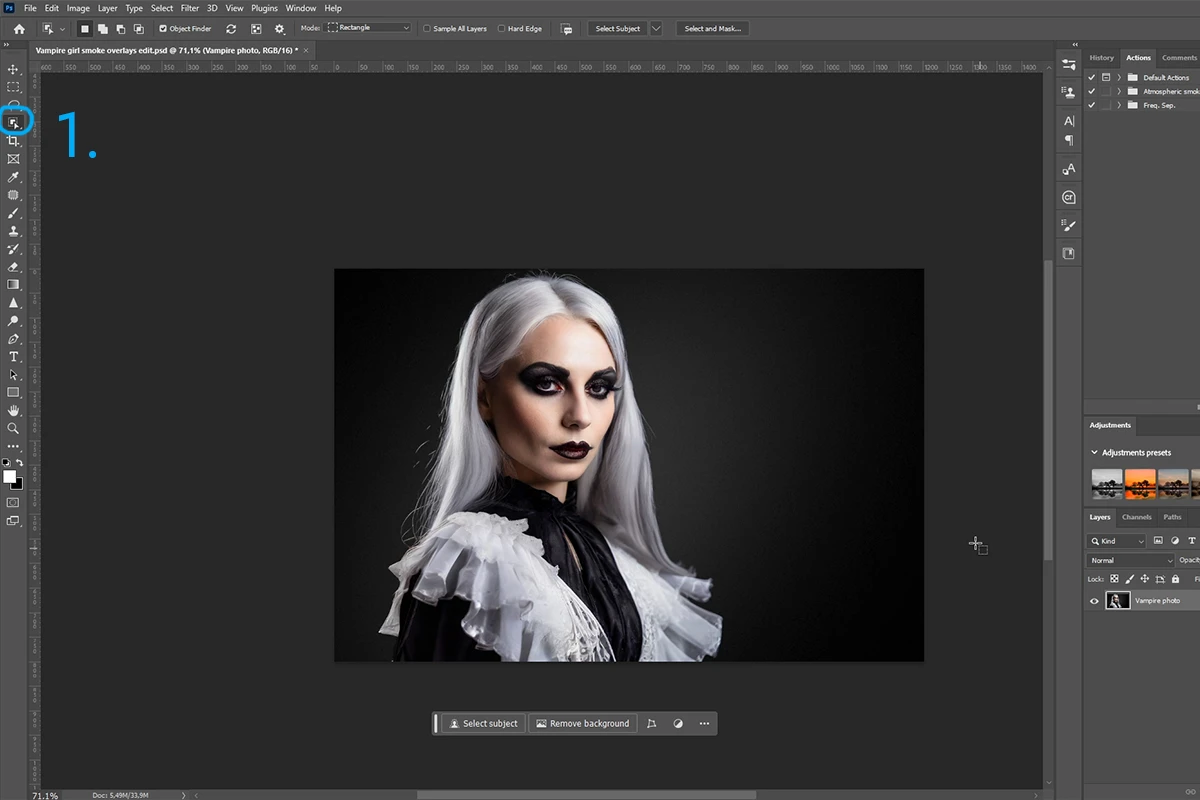
1. Select the “Object selection tool“, which can automatically select an object.
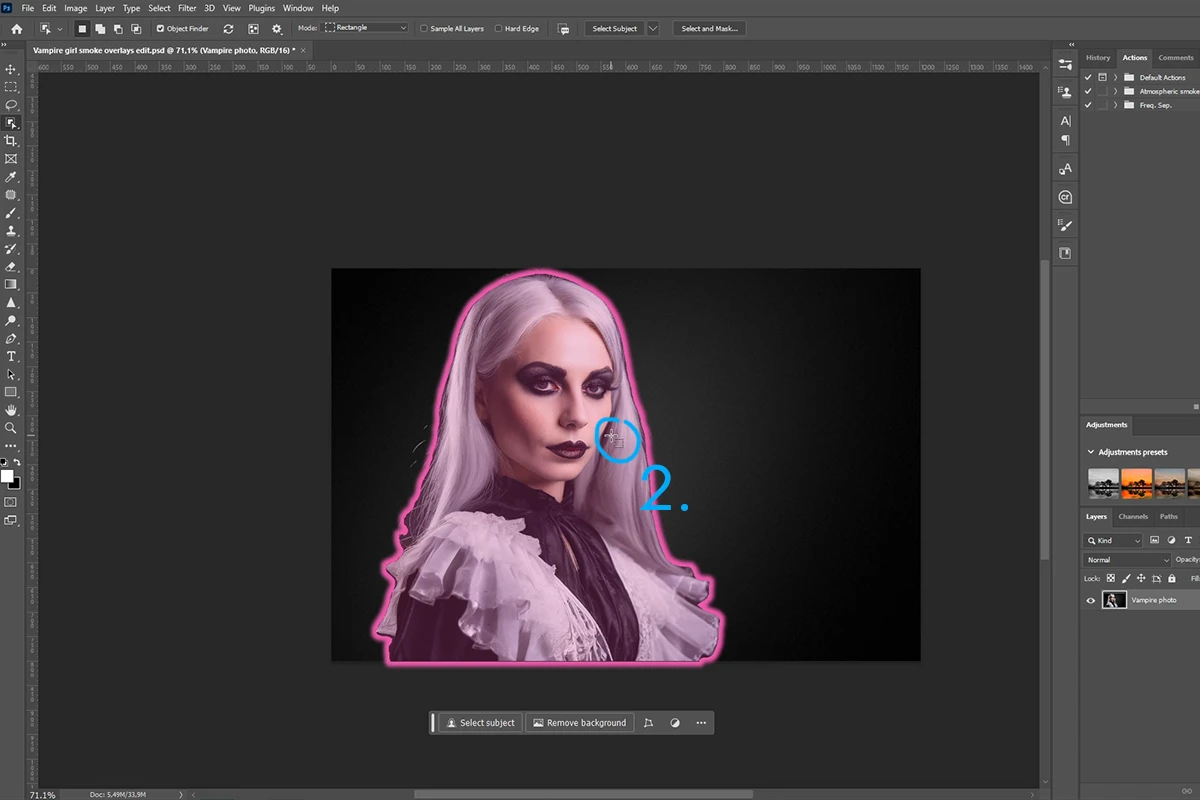
2. We select the object that we want to be in front of the smoke, in our case it is a vampire model

1. Select the layer in the foreground
2. Add a Hue/Saturation layer
(In the menu bar, choose Layer > New Adjustment Layer > Hue/Saturation. Click OK in the New Layer dialog box.)
3. Assign Hue/Saturation to the layer below it.
3. After selecting, press the keyboard shortcut “CTRL + J“
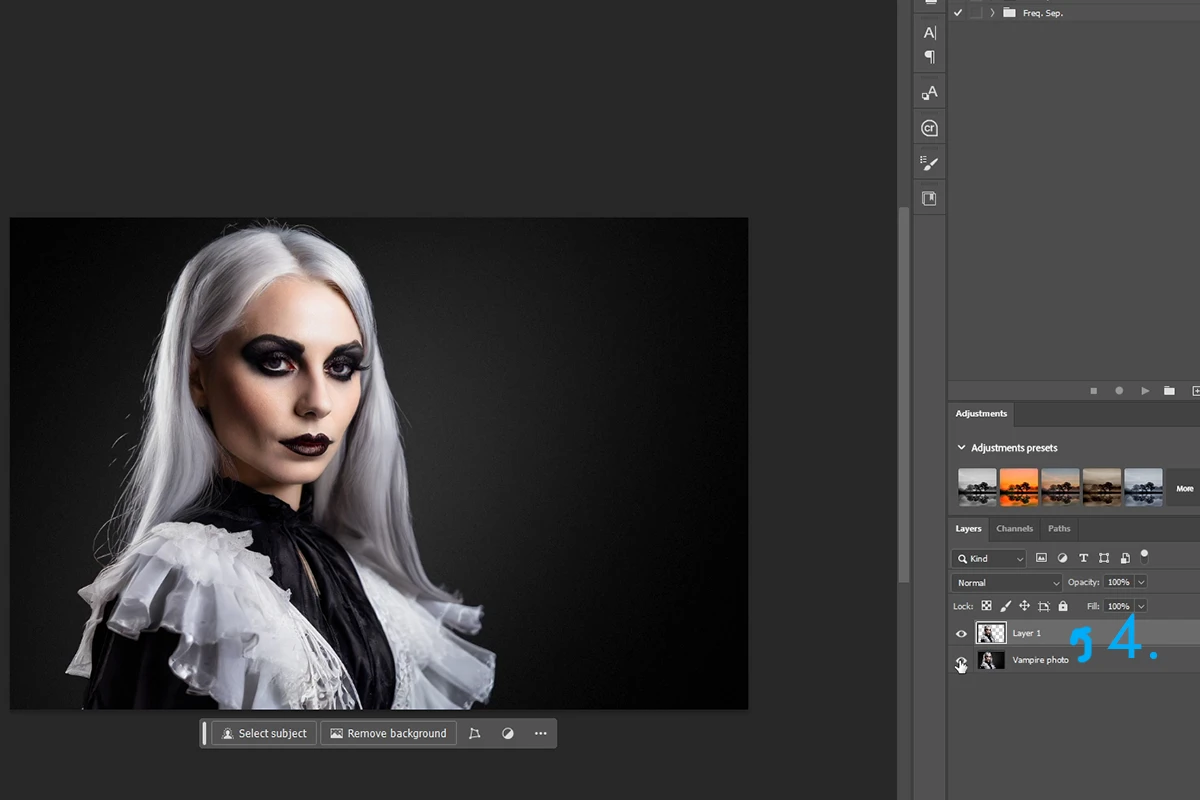
4. We will create a new layer with the model (object) itself
This gives us a layer of the model itself, so it’s much easier to work with overlays and we can choose to place the smoke behind or in front of the model.
2 step: Select and insert smoke overlay in Photoshop
In the second step we will show how to add a smoke overlay in photoshop.
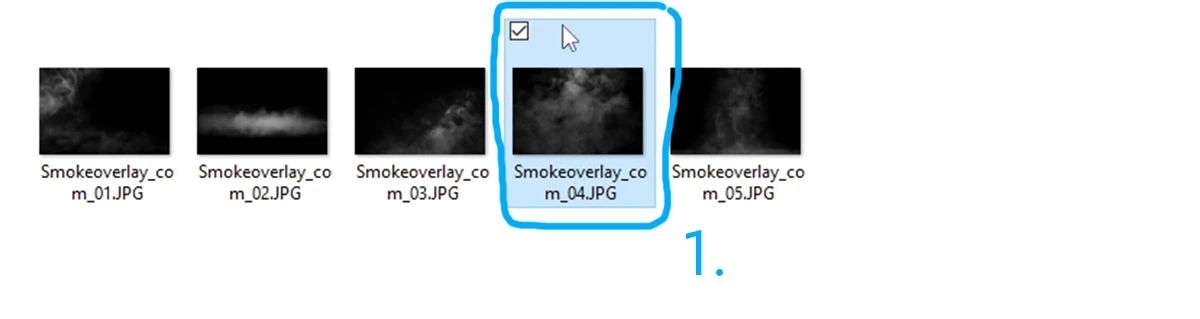
1. Select the overlay in the folder and drag and drop it into Photoshop

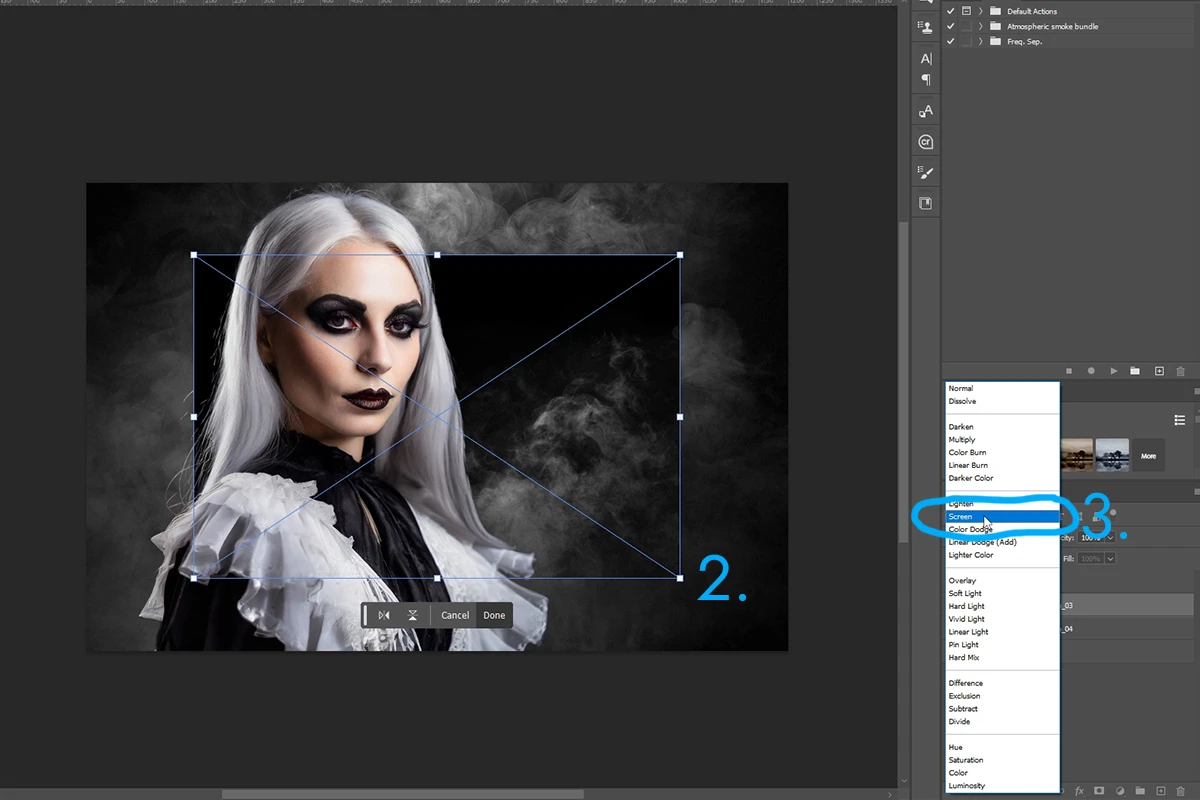
3 step: Position the overlay into the image and set the blend mode
We’ll show how to easily position and resize the overlay and adjust it using “blending mode” to fit the image as closely as possible.
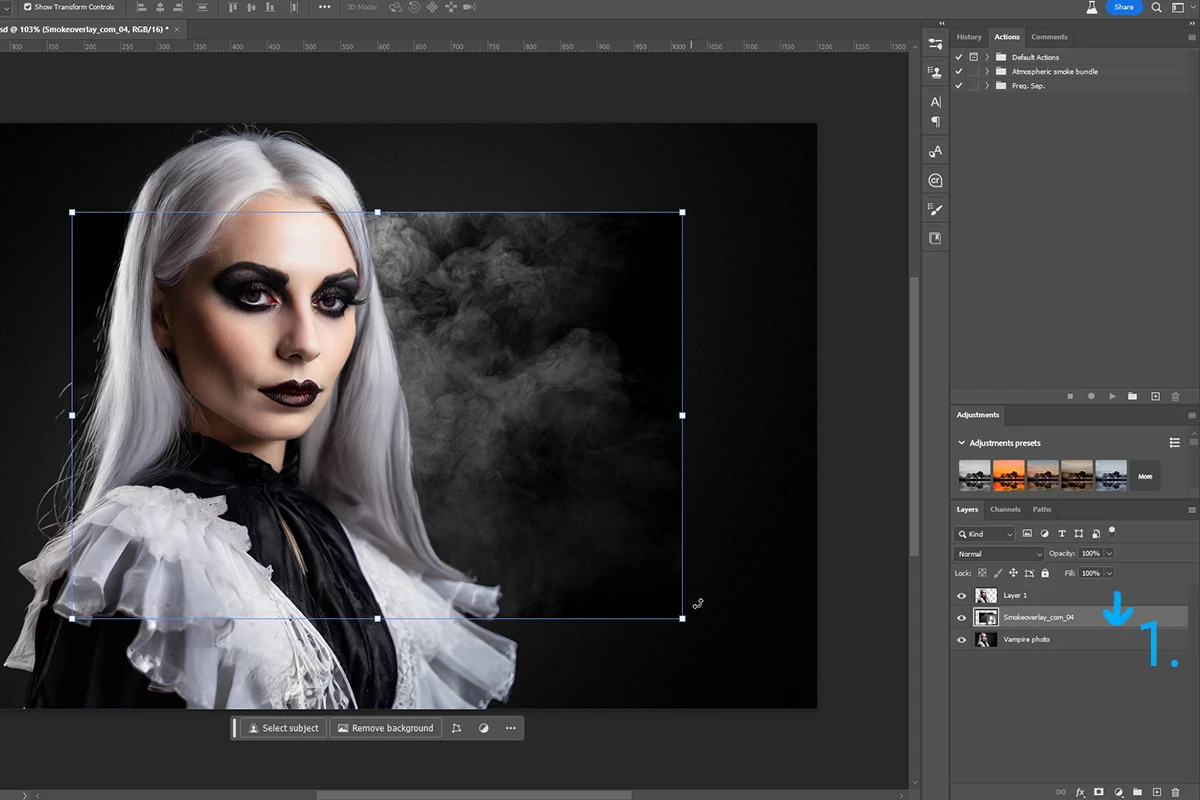
1. Move the overlay layer behind the model
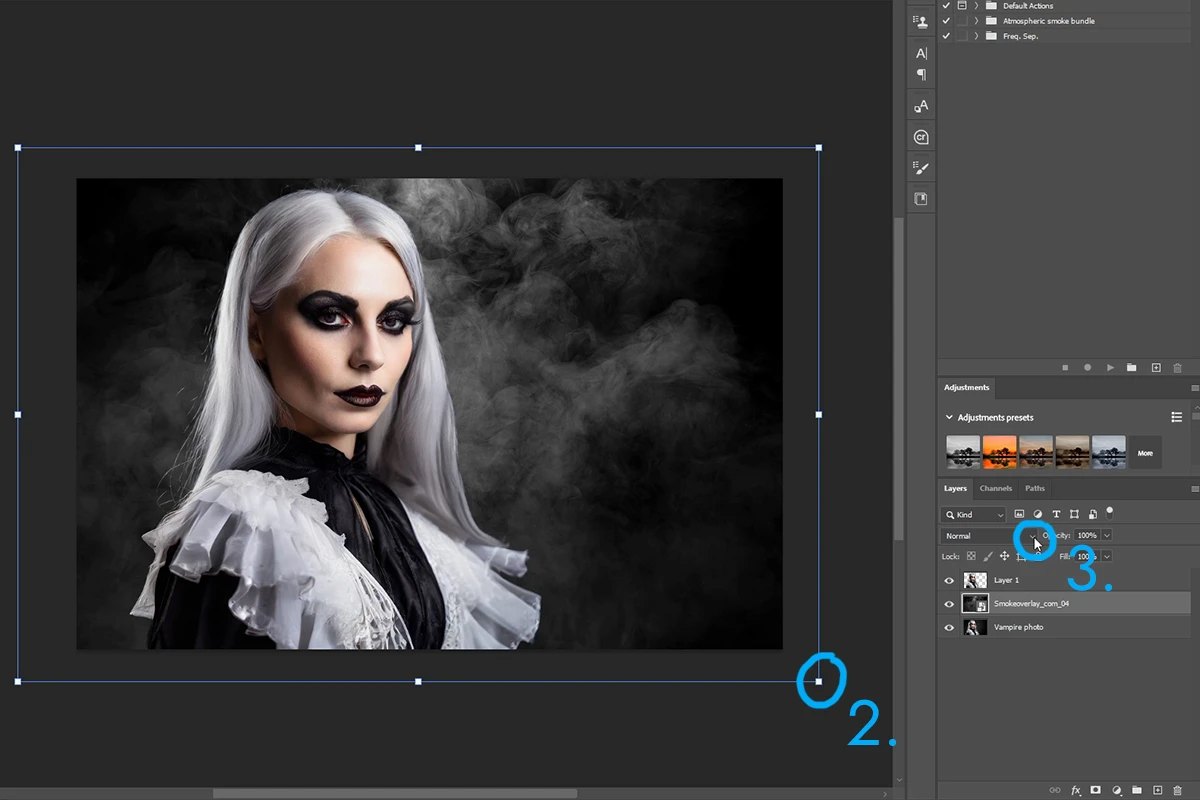
2. Resize the overlay to fit the photo (If you can see an edge somewhere it won’t bother us, we’ll show you how to unmask it later.)
3. Click on the layer blend setting
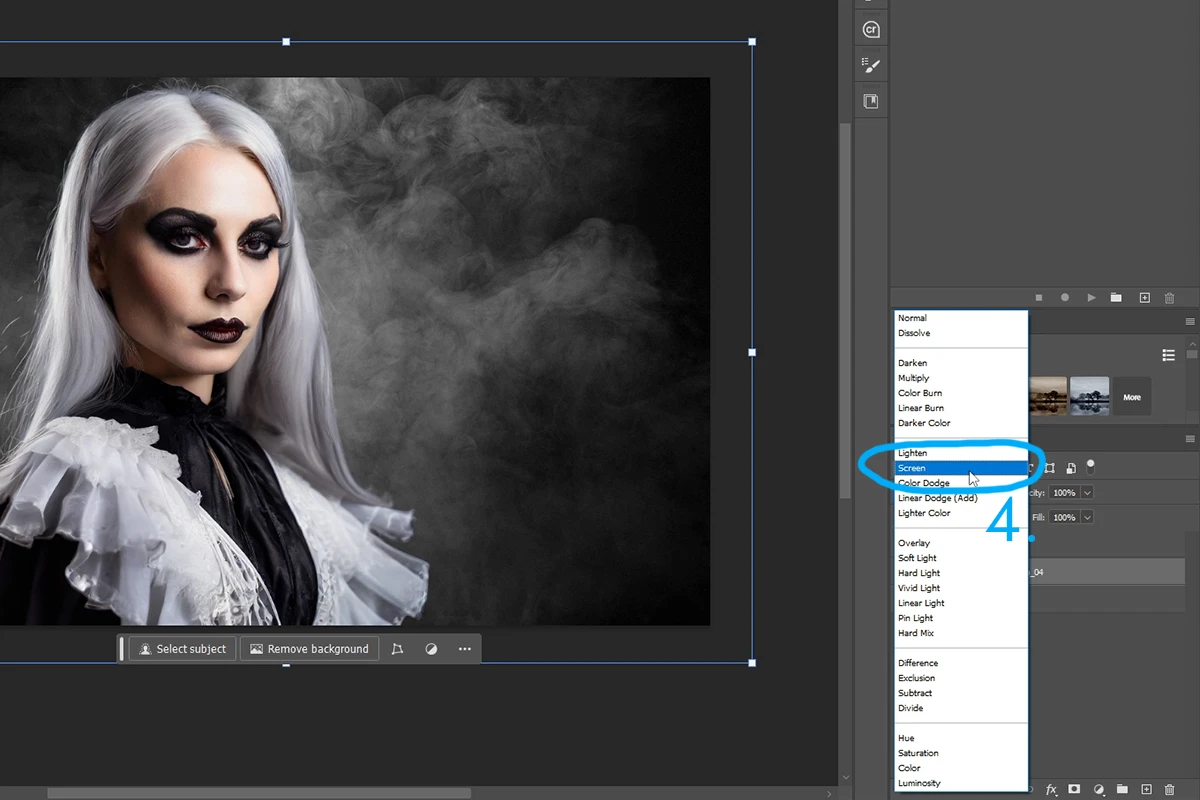
4. Set the overlay blend to “screen”
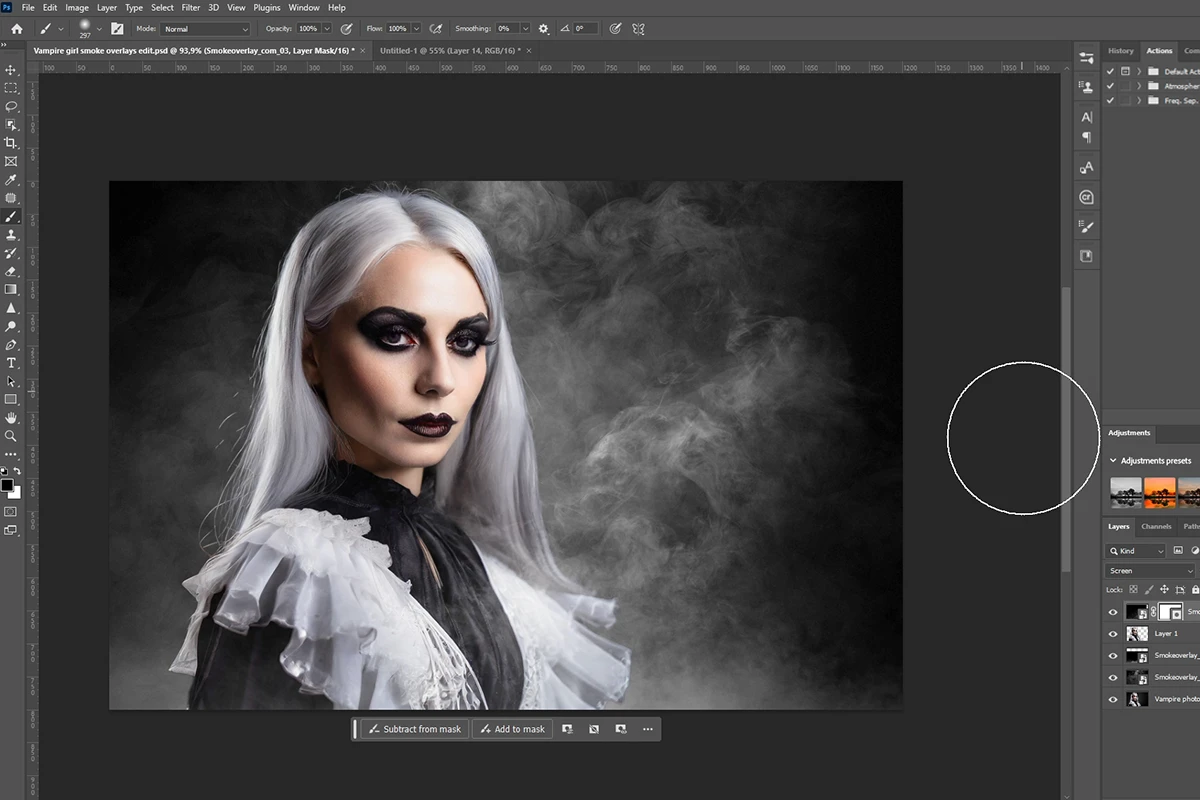
4 step: Add another layer of smoke
Select a smoke overlay that could complement the current smoke and paste it into Photoshop.
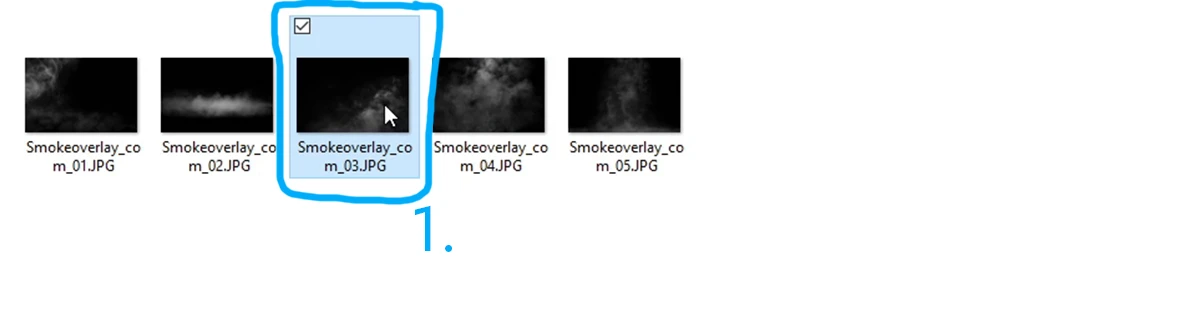
1. We’ll pick another overlay to complete the scene
2. Drag and drop the overlay into photoshop
3. We select “screen” again in the blend mode settings, but we can also select another one that we like better.
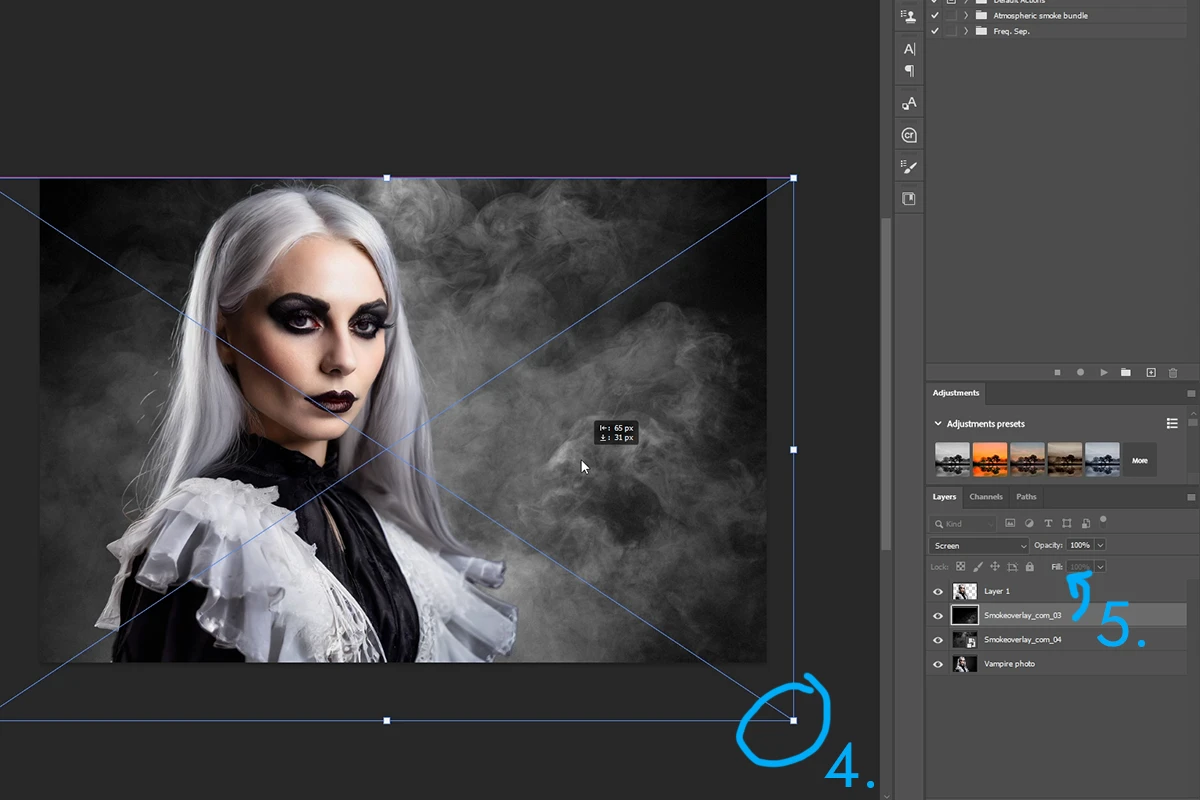
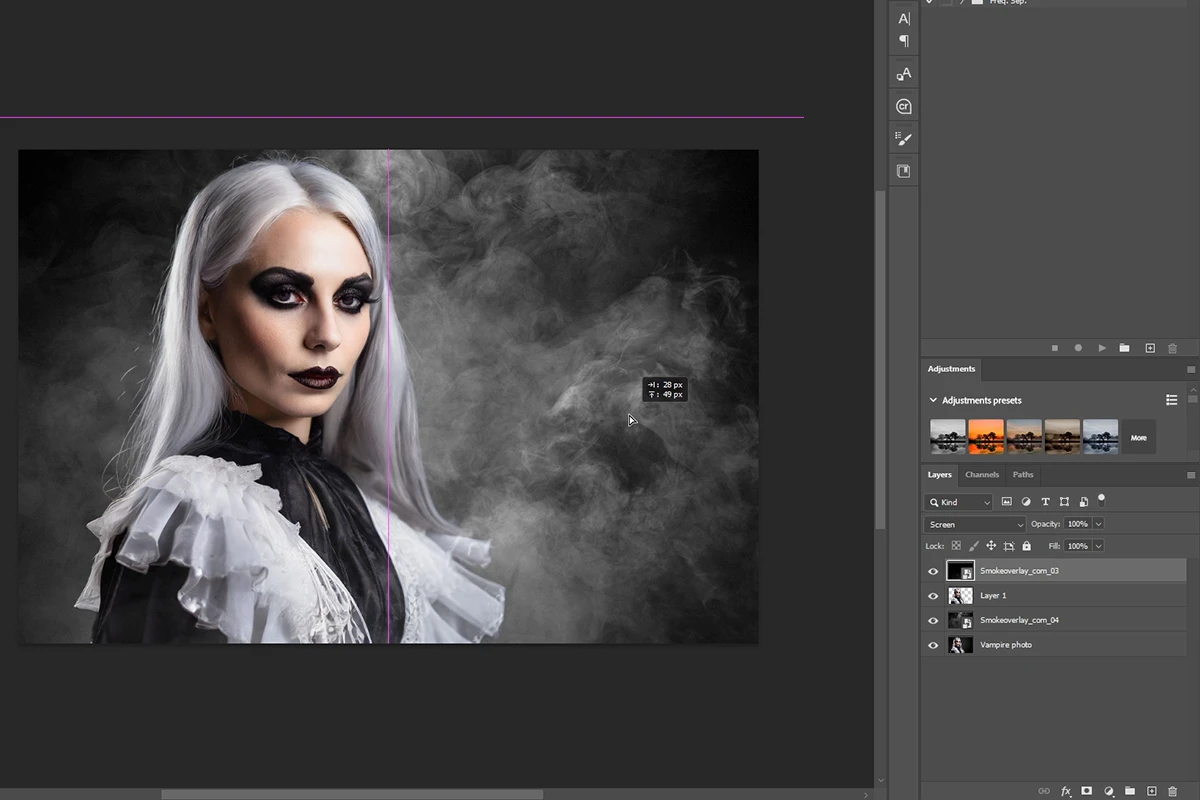
4. Resize and place the overlay as you find it best
5. Finally, move the overlay layer over the model layer to make the smoke appear to be in front of her.
5 step:(optional) How to deal with overlay edges? Use a mask layer!
With overlays, it often happens that we are left with overlay borders somewhere in the image that don’t look good. In this case, we use a mask to hide the edge.
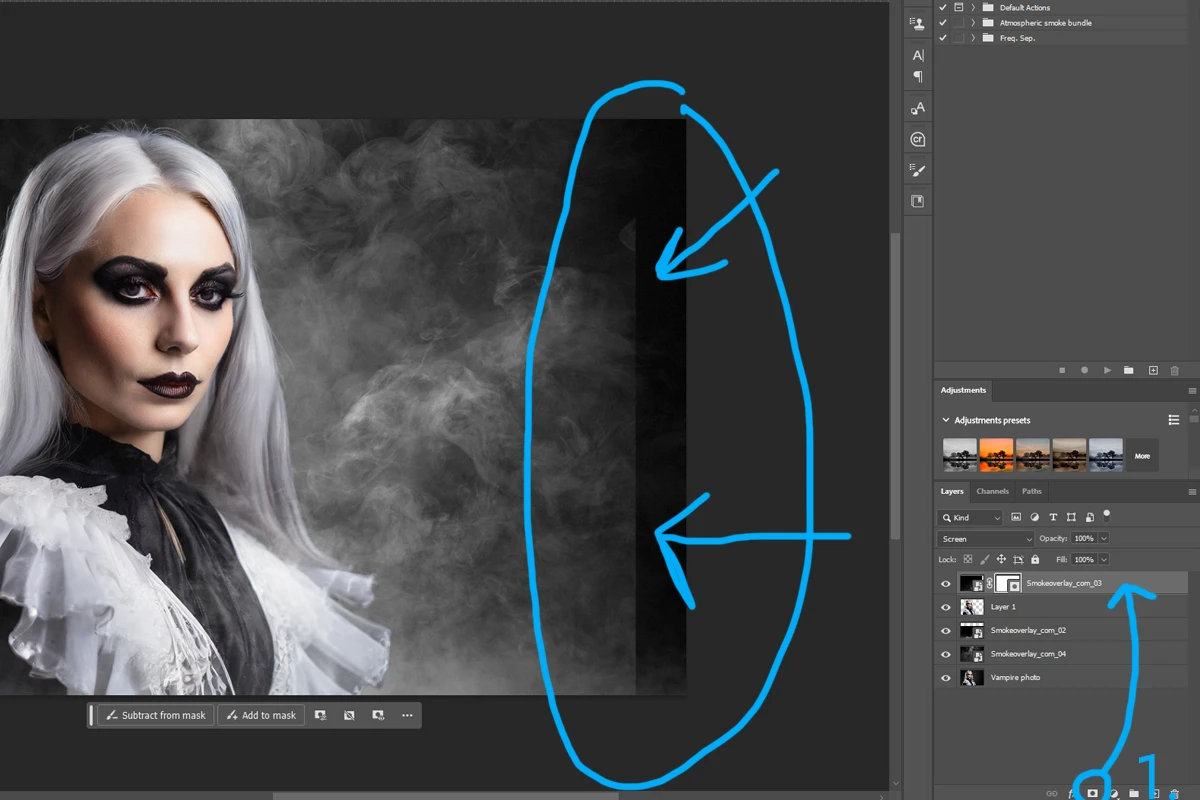
1. Create new mask layer
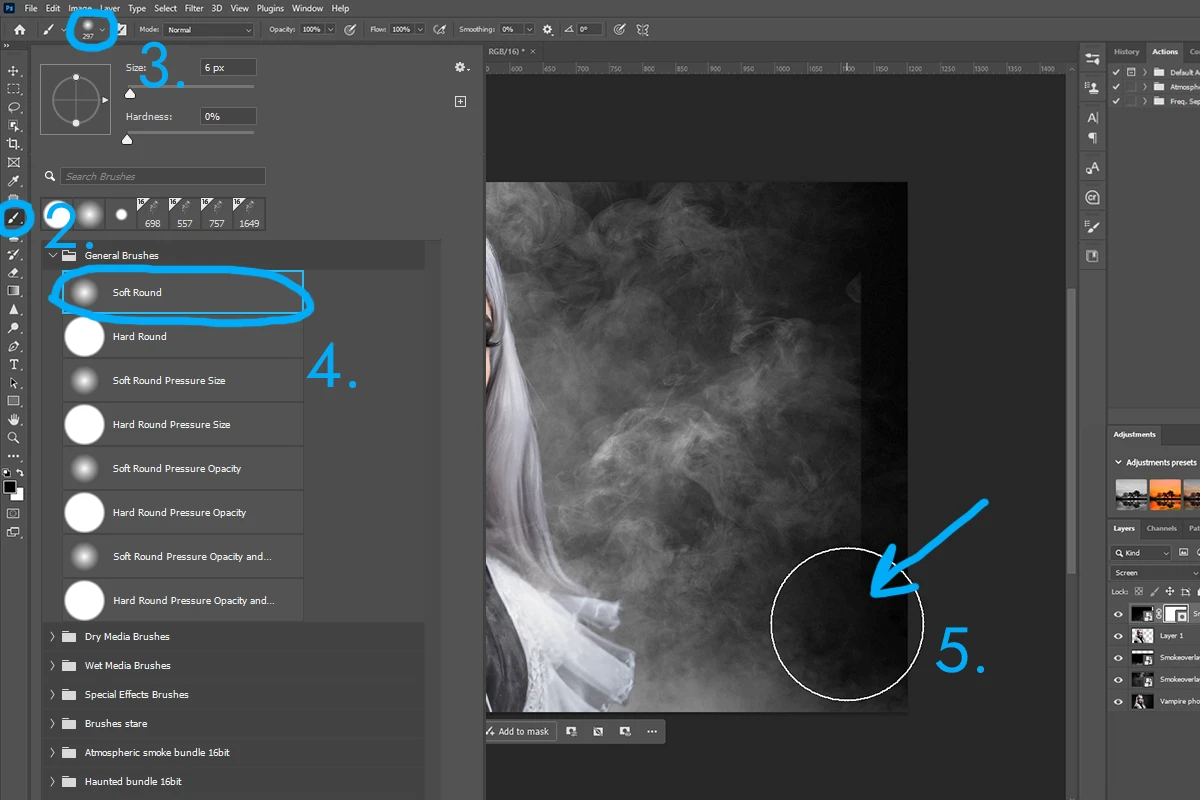
2. Select brush tool
3. Select brush menu tool
4. Select soft round brush (100% opacity)
5. Use brush with black colour on edge of layer (ensure that you have active mask layer)
6 step:(optional) Change the colour of the overlay and spice up your visual creation!
Compared to brushes, overlays are a bit more complicated to change the colour, but still, this modification is very quick, easy and worth it!
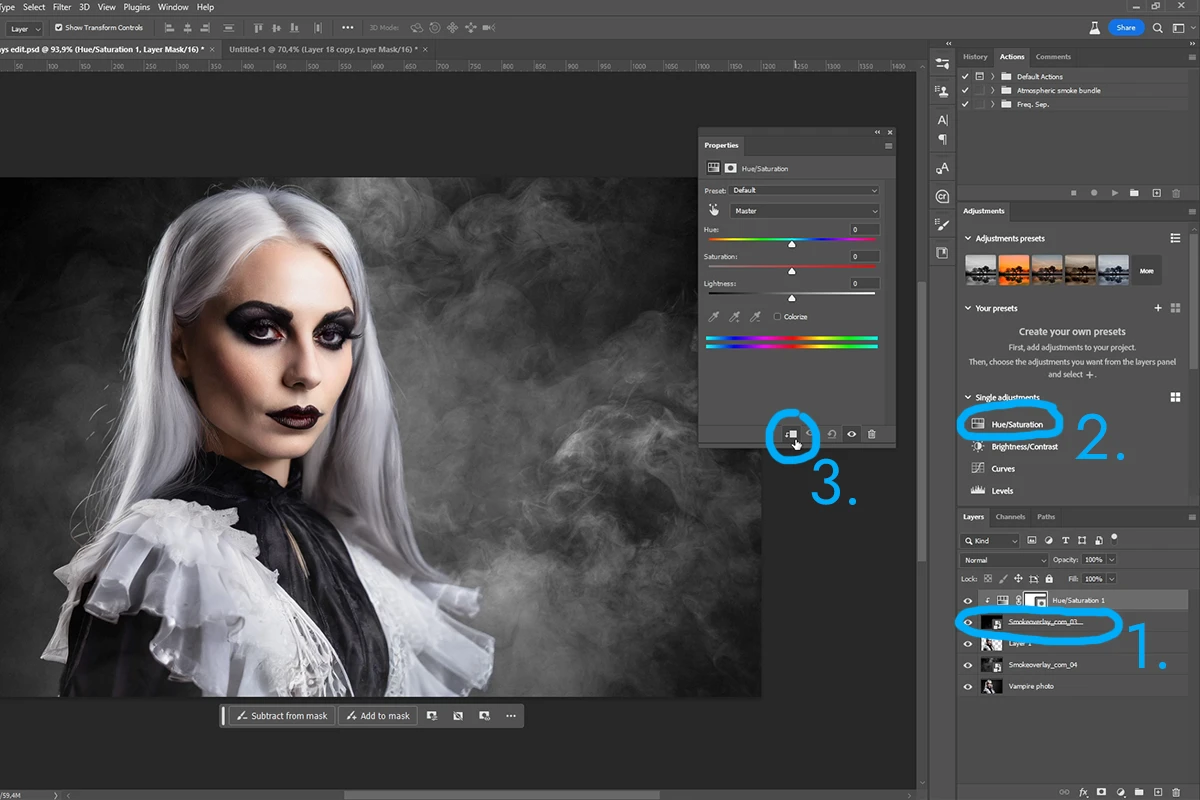
1. Select the layer in the foreground
2. Add a Hue/Saturation layer
(In the menu bar, choose Layer > New Adjustment Layer > Hue/Saturation. Click OK in the New Layer dialog box.)
3. Assign Hue/Saturation to the layer below it.
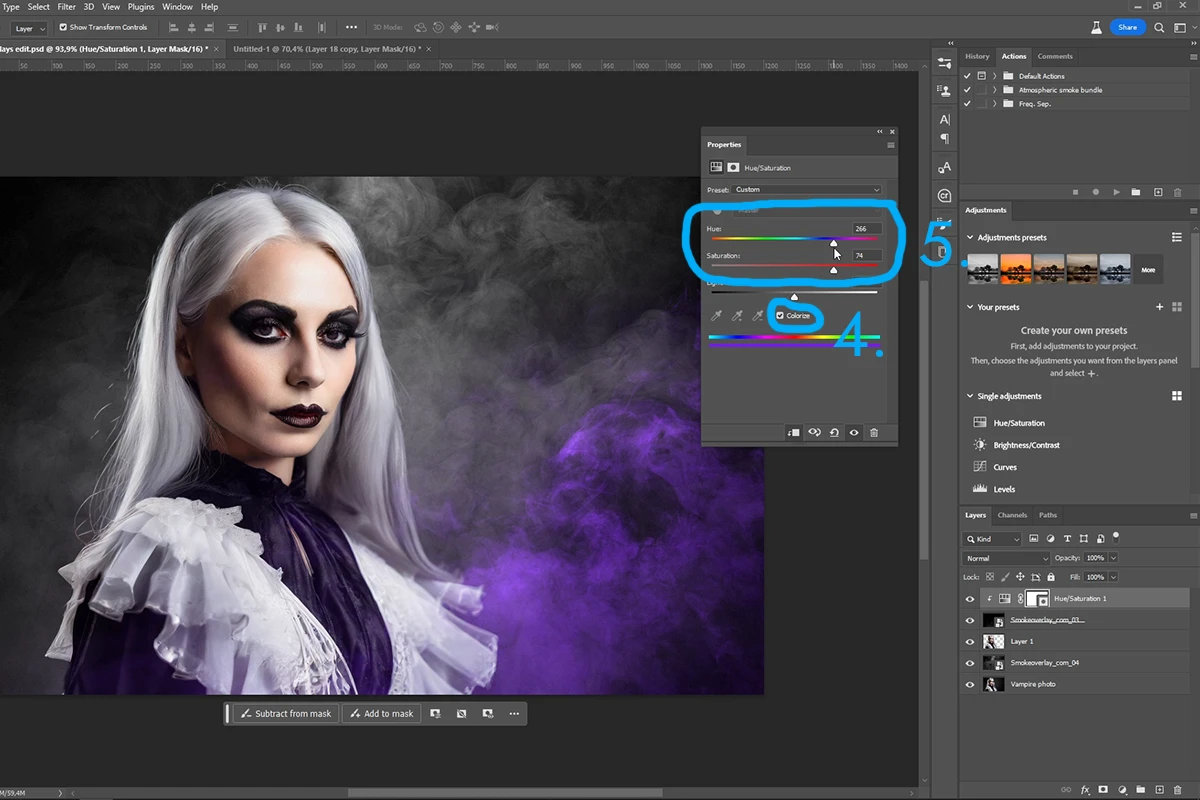
4. Check Colorize, this allows us to select the HUE and saturation
5. Use the sliders to find a suitable colour and use Saturation to adjust the intensity.
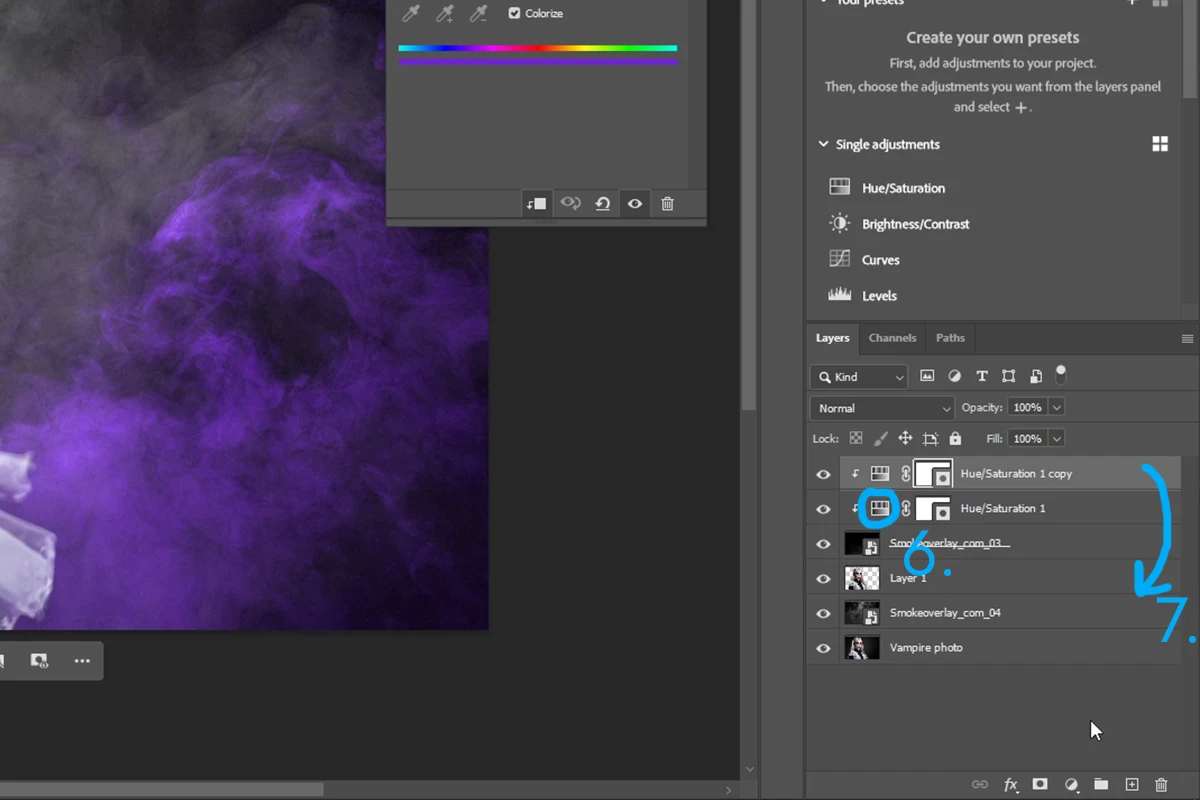
6. Select the already finished Hue/Saturation layer and create a copy using the keyboard shortcut “CTRL + J“
7. I move the new Hue/Saturation 1 Copy layer above the Smokeoverlay_com_04 layer (so I can assign it)
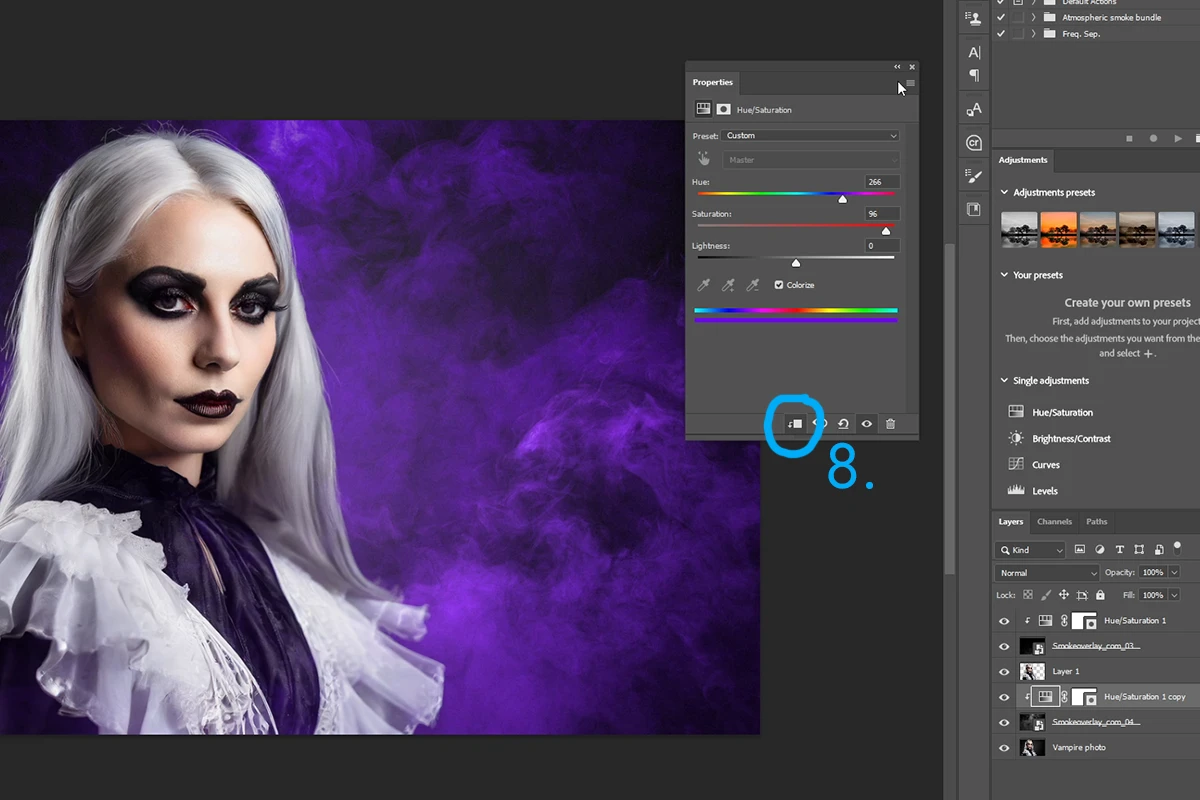
8. Use the button to assign a layer to the layer below it and get this effect for that smoke layer.
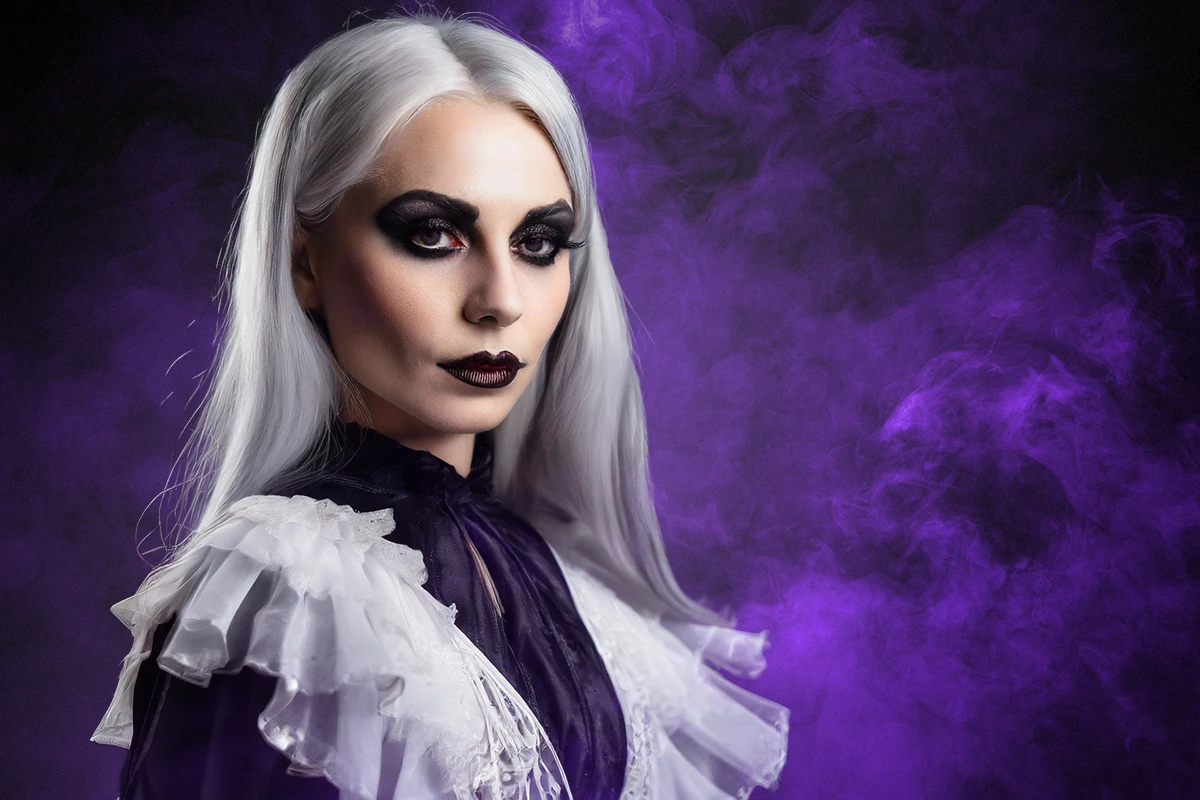
As we have shown overlays are better quality, more precise due to the fact that they can reach a higher size (8800px were used) , so we can put them on the highest quality projects. They are a bit slower to work with than brushes, but their potential is endless.
How to add smoke in Photoshop? Create your own smoke!
There is a way, How to create smoke in Photoshop without smoke brushes and smoke overlays, but it requires a lot of effort, artistic spirit and the result is usually not nearly as realistic as our previous two options.
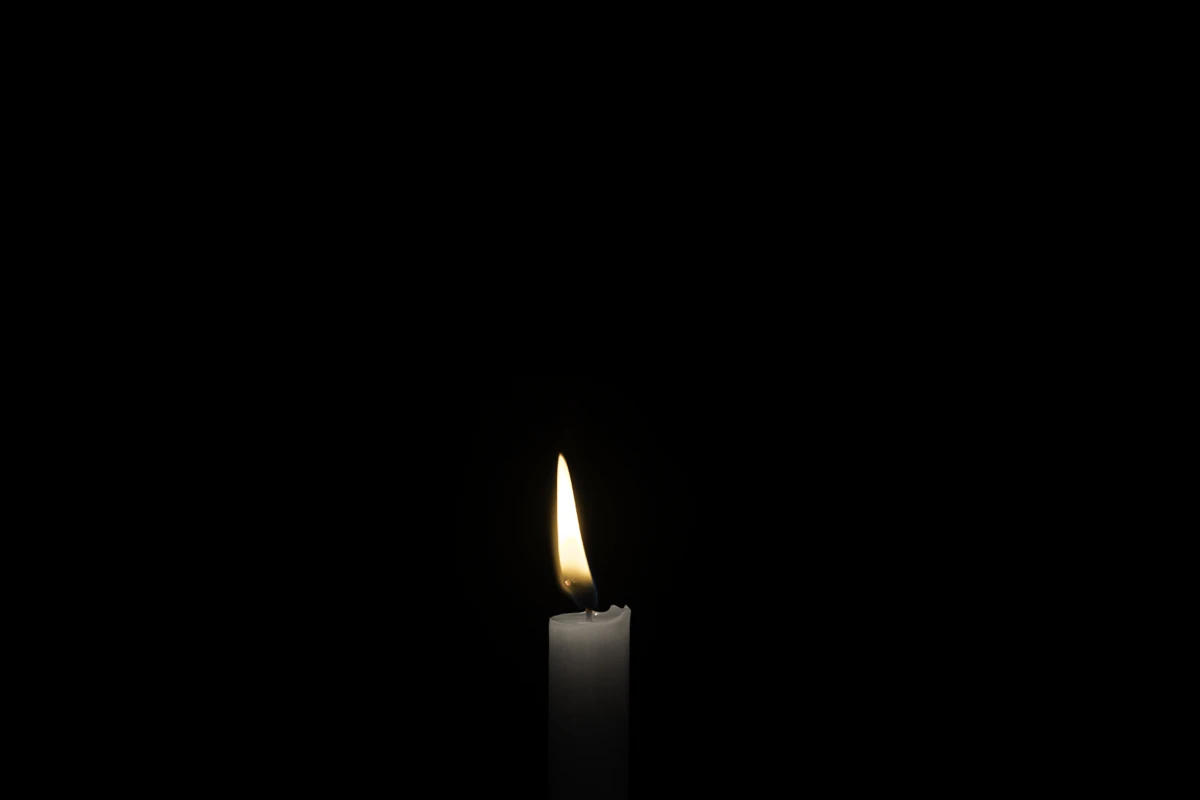
1 step: Create a new blank layer and draw the desired smoke shape
This is first step to how to create smoke in photoshop, which will decide the realistic look of the result.
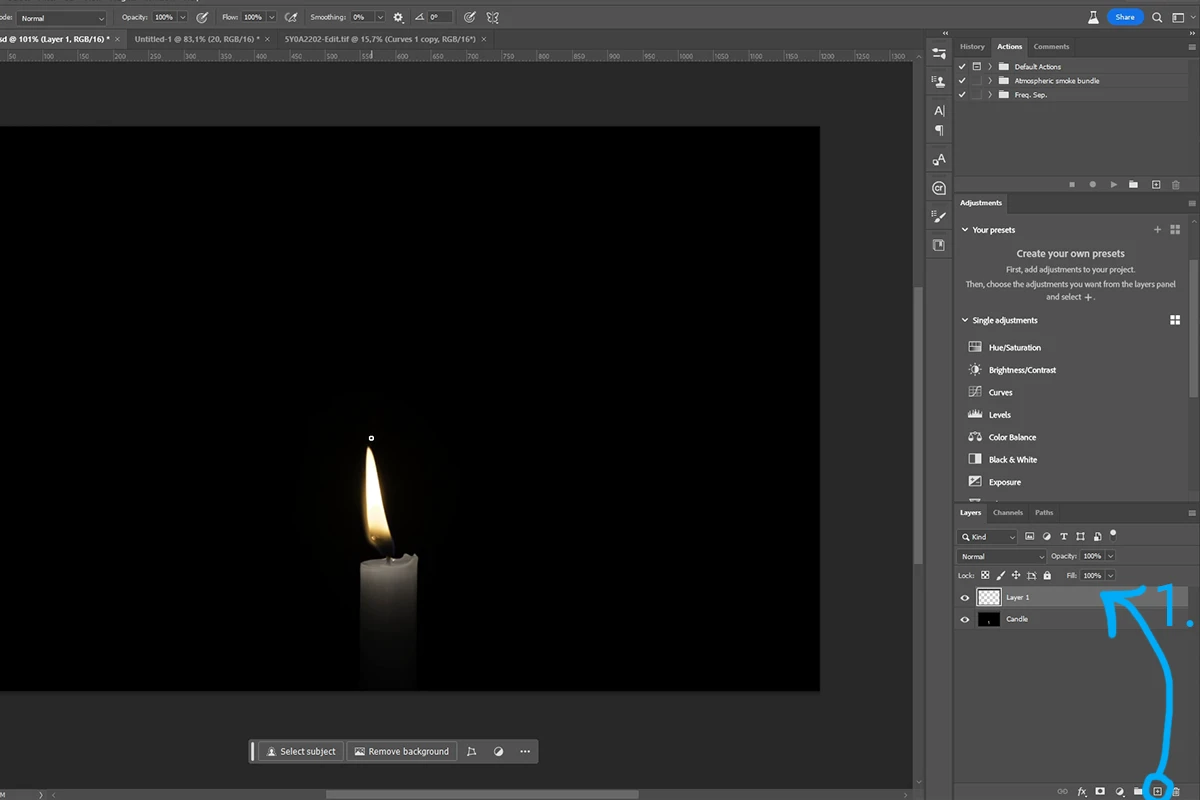
1. Create a new empty layer
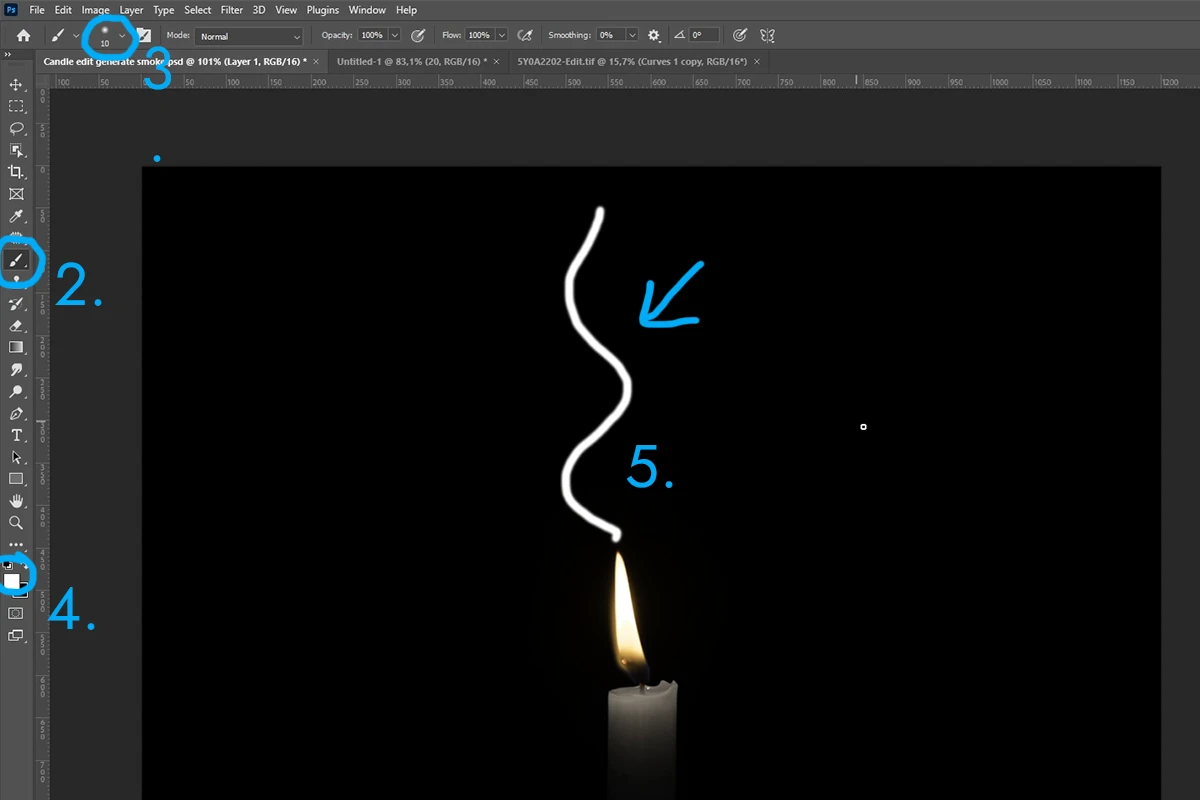
2. Select the brush tool
3. Select the brush tool from the menu and choose Round Brush
4. Select the colour of smoke you want.
5. Draw the shape of the smoke
2 step: Blur the layer using the Path Blur function
In this step, we will blur the drawn shape into a smoky shape.
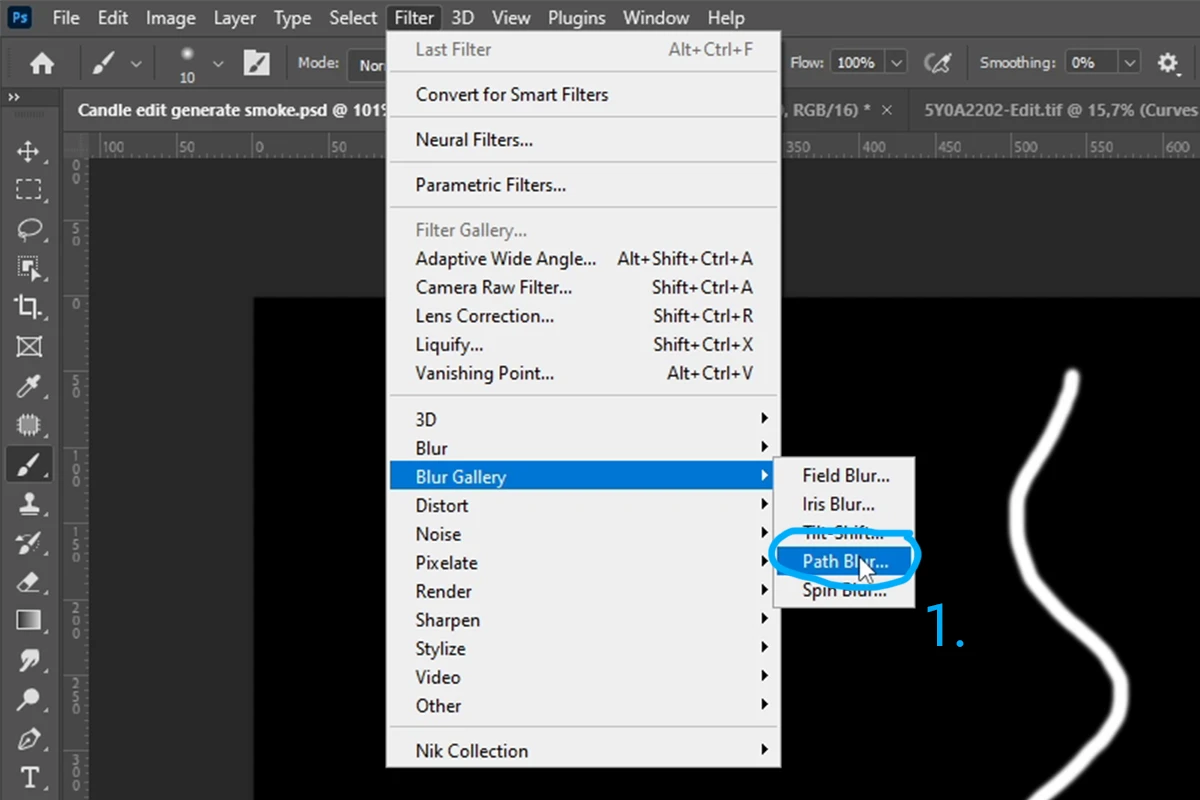
1. Select Blur Gallery > Path Blur
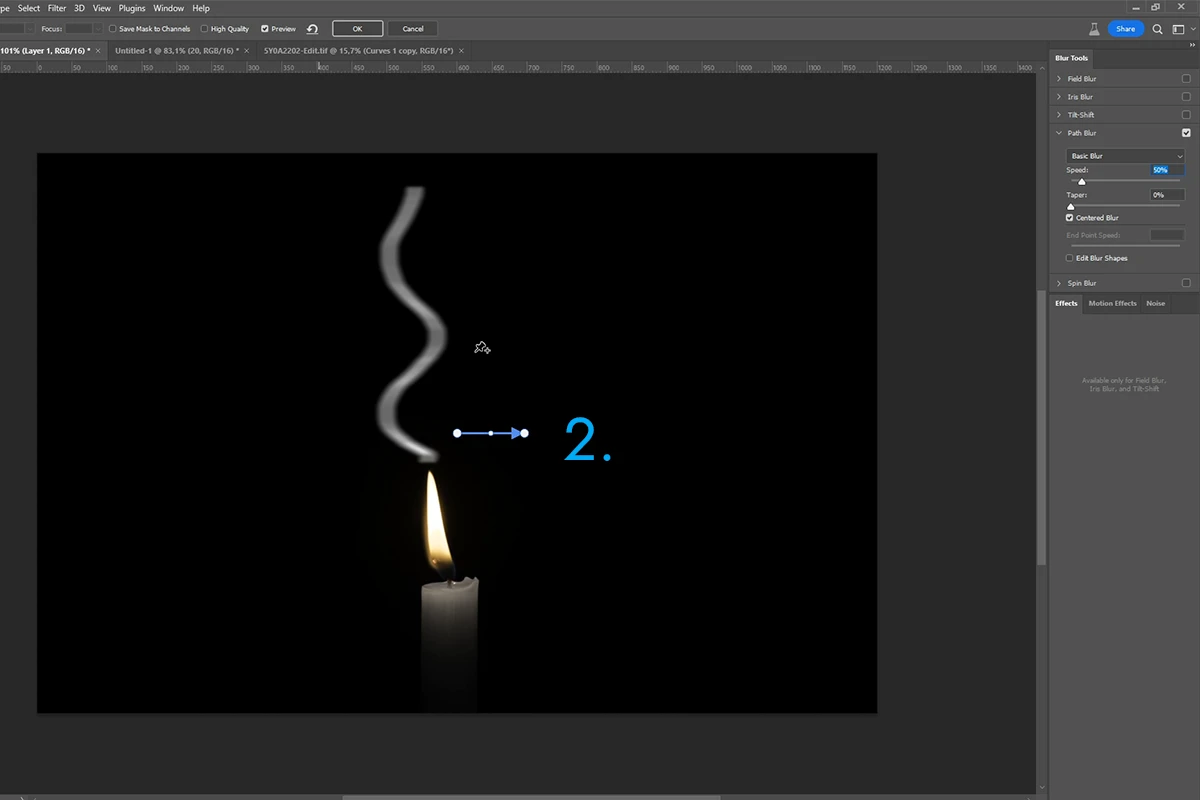
2. The Path Blur edit mode will open, where you will find the line you need to place on the shape you have drawn
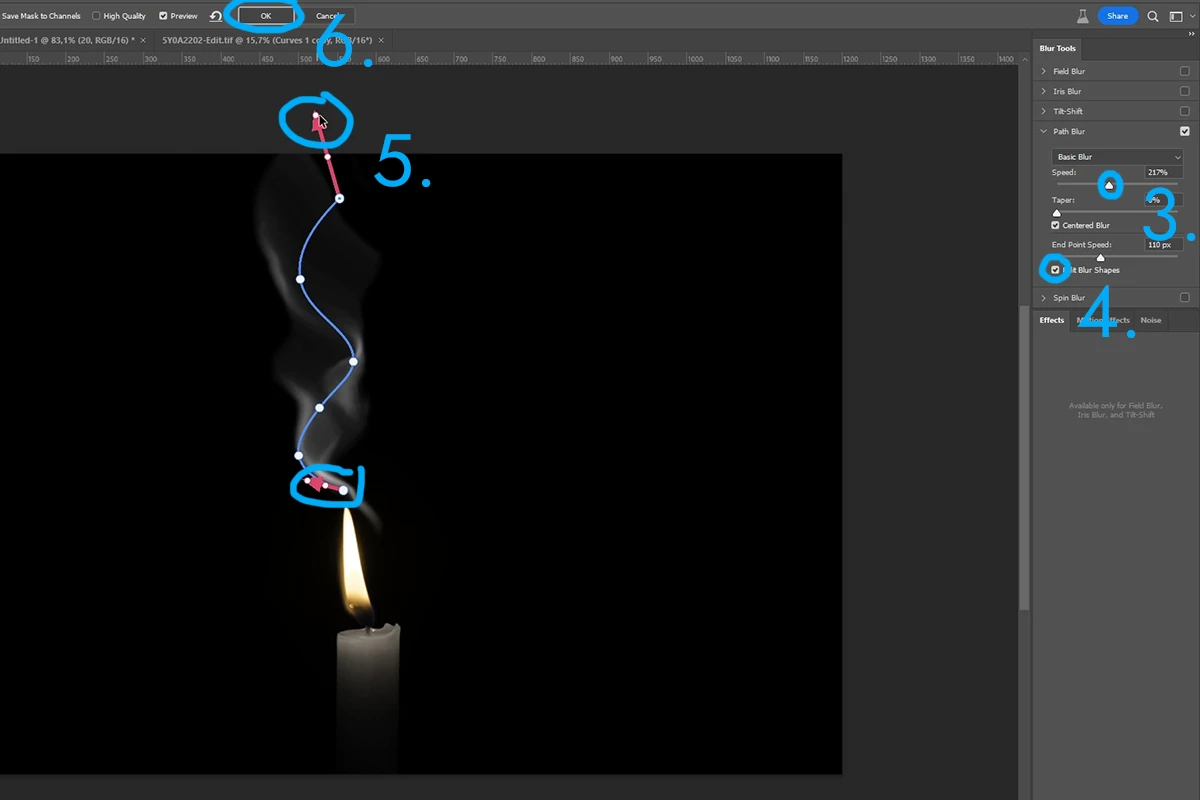
3. Add a higher Speed value
4. Check “Edit blur shapes“
5. Stretch the red arrows as we think the result will be best.
6. Confirm the edit
3 step: Create new layer with smoke (Render cloud)
This is first step to how to add smoke in photoshop, který bude rozhodovat o uvěřitelnosti výsledku
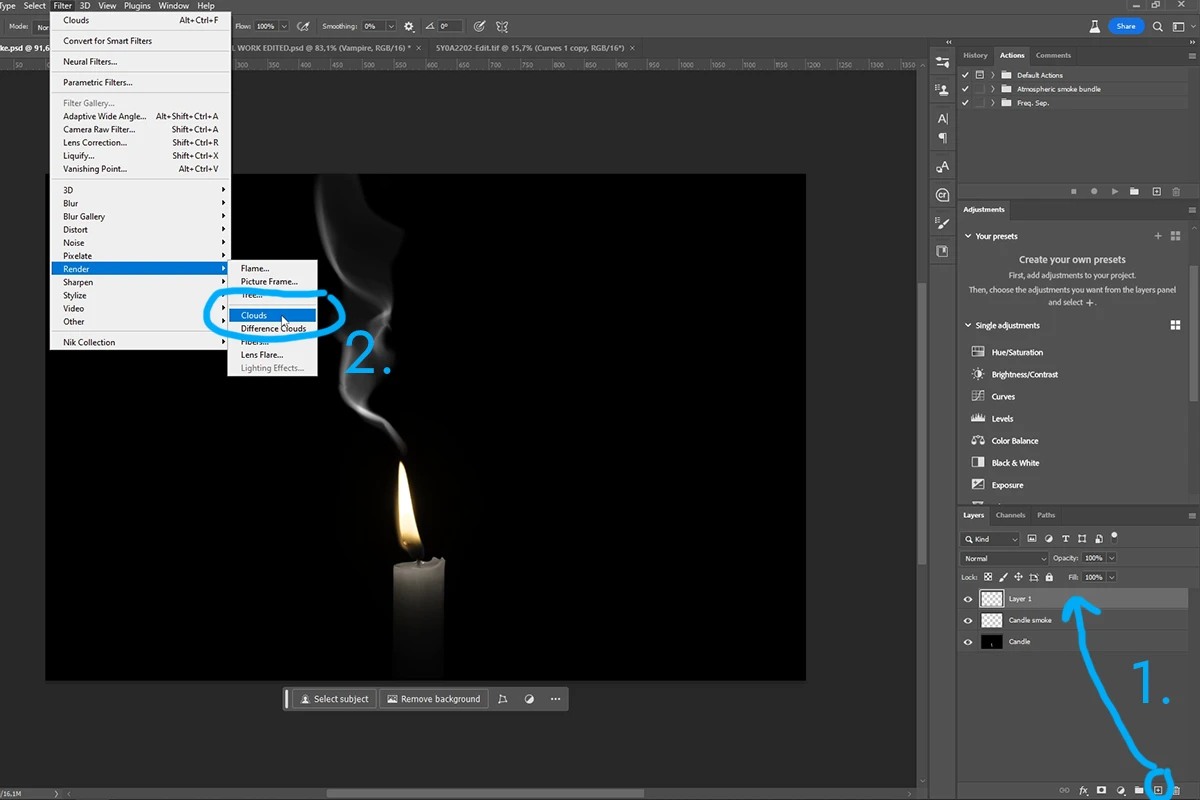
1. Create a new empty layer
2. Apply the Render > Clouds effect to it
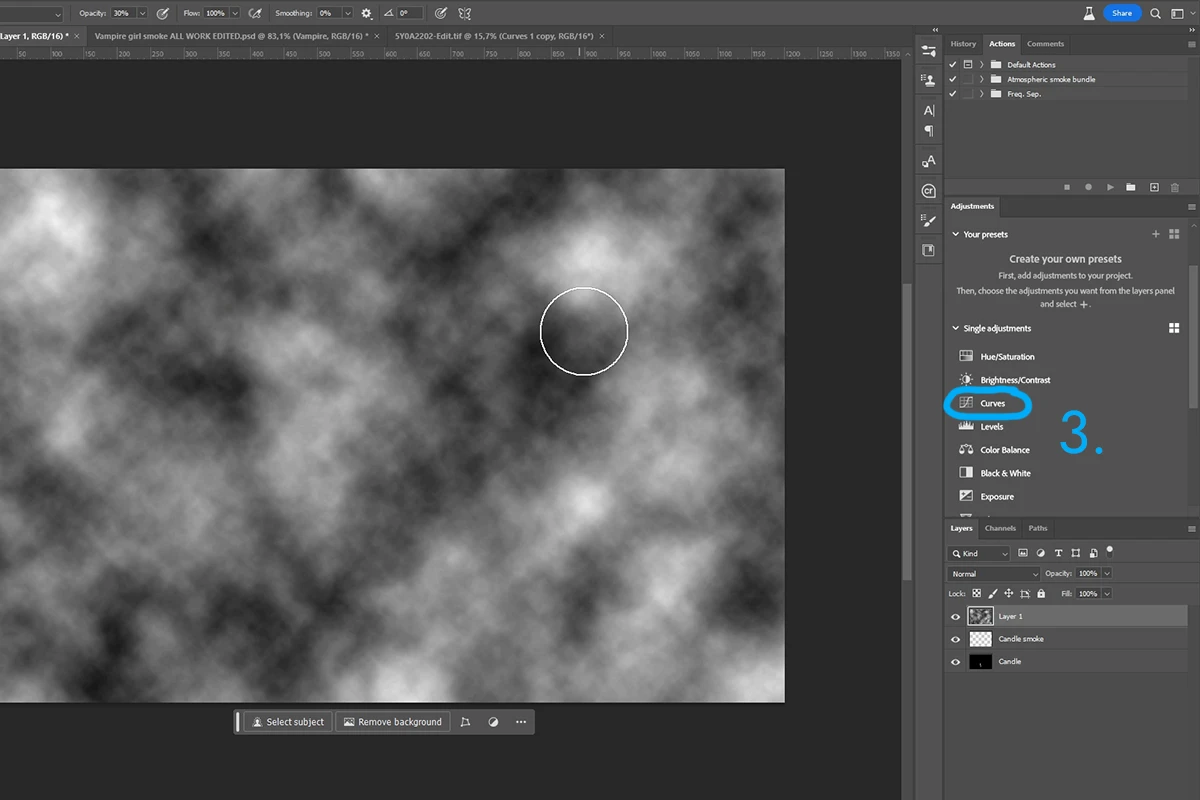
3. Select a new curve layer on top of the newly generated smoke layer.
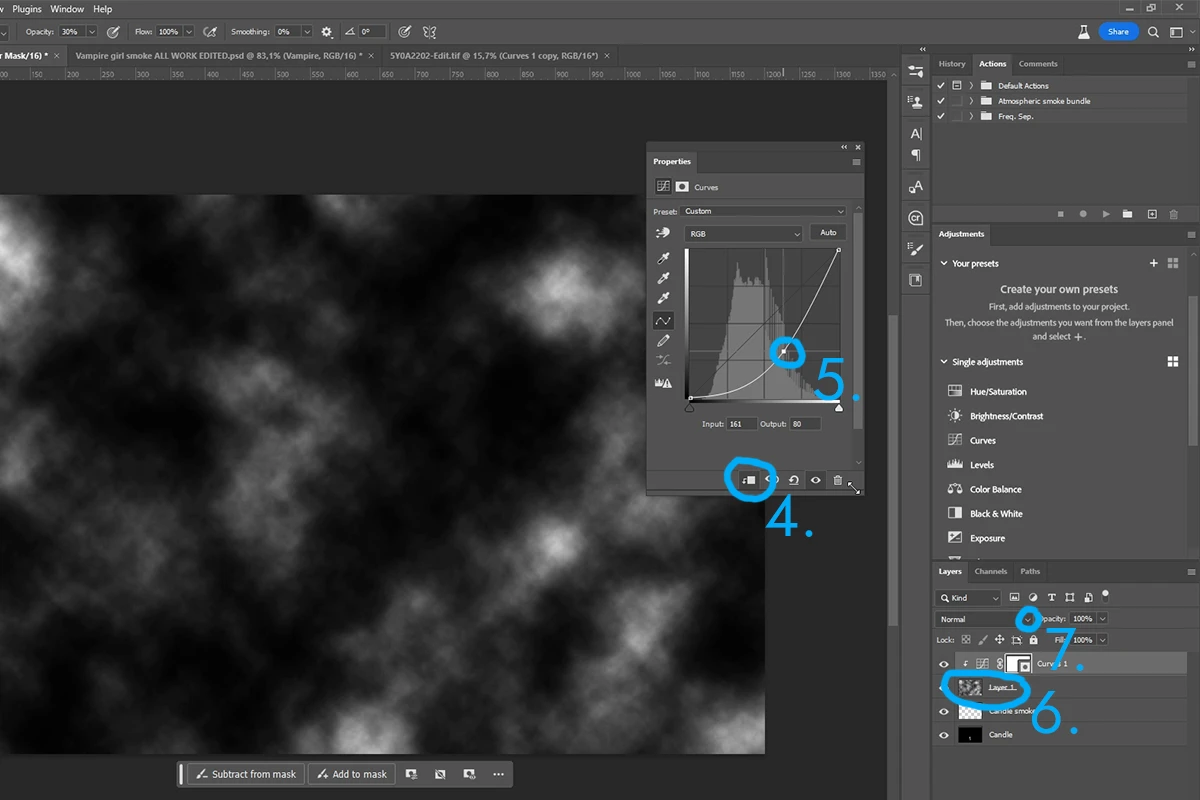
4. Check the box that assigns curves to the layer below it
5. Change the layer using Curves
6. Click on the smoke layer itself
7. Click on Blending mode and select “Screen“
4 step: We use a mask to adjust the smoke
In this step, we add a light touch of additional smoke to the image. To do this, we use a mask to select what part of the smoke layer will remain visible.
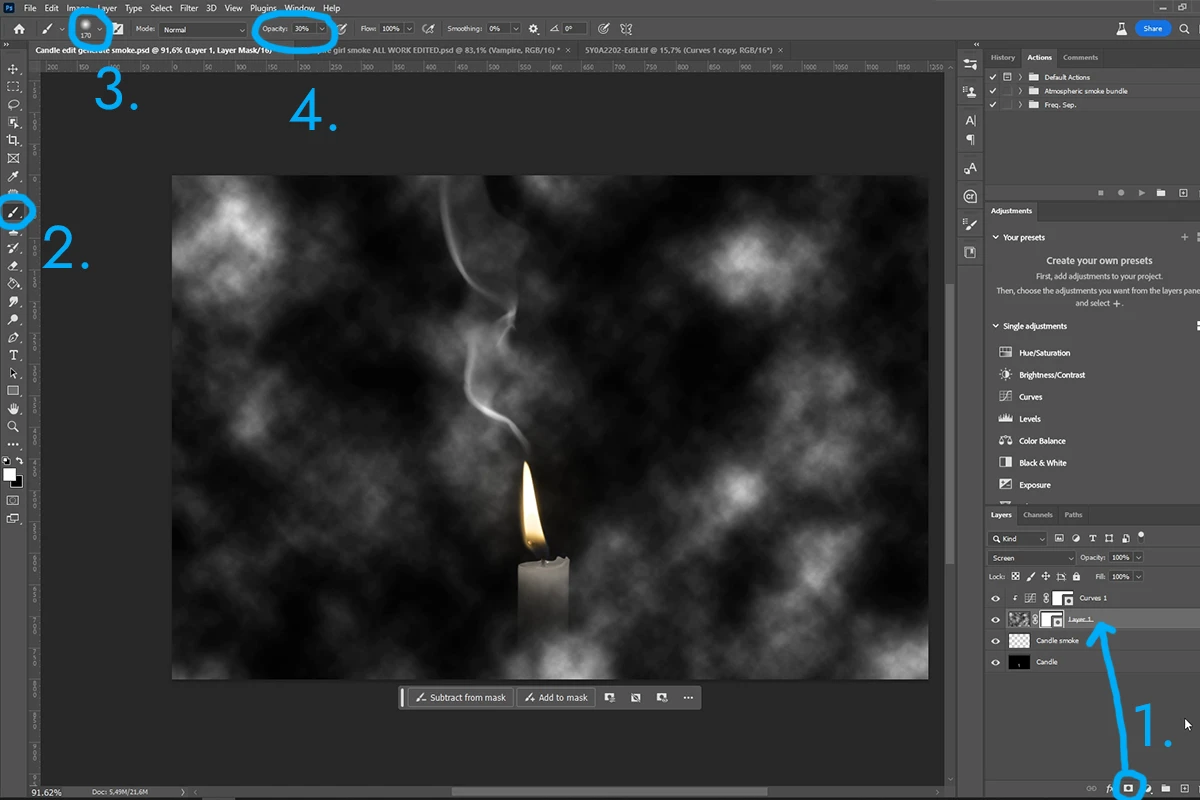
1. Create a new mask for the generated smoke layer
2. Select the brush tool
3. Choose a round brush with a soft edge
4. Adjust opacity as needed
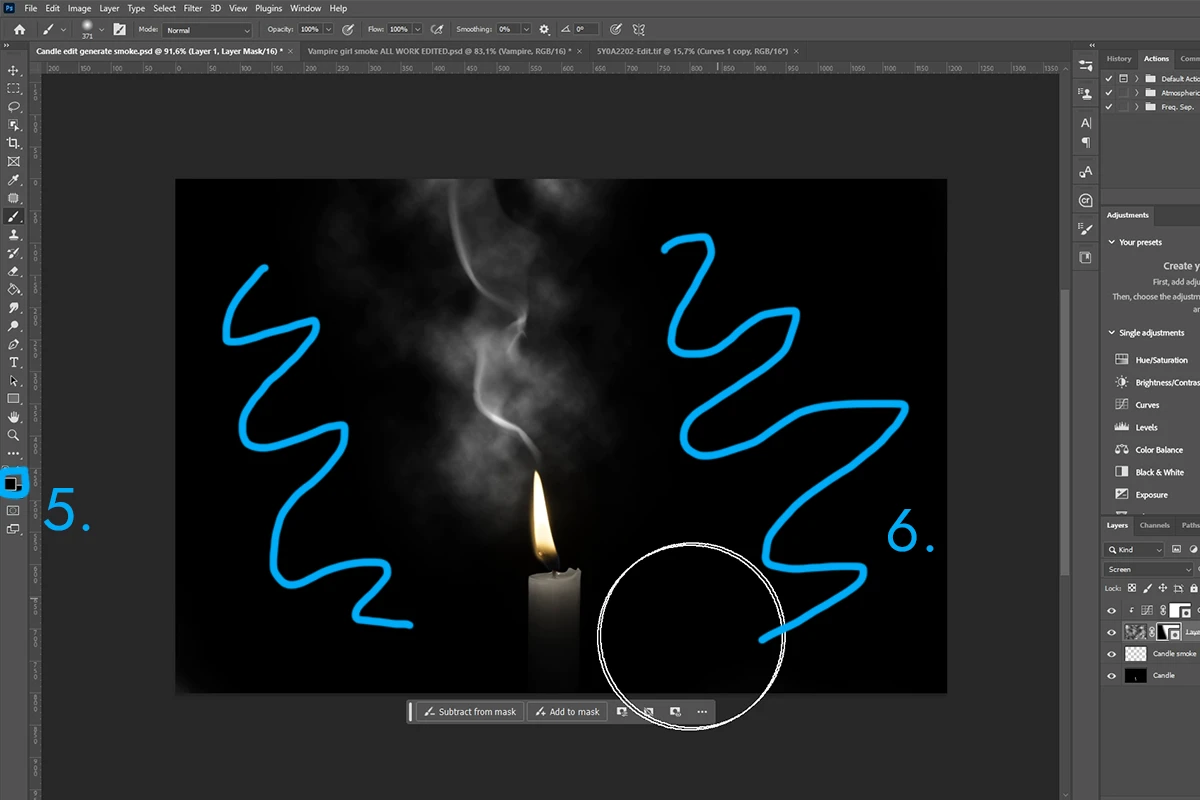
5. We choose black
6. And we use a brush on the mask to hide most of the smoke.
Done, we’ve finished creating our own smoke, but as you can see, the effect is much less realistic compared to the previous two variations, which is why we don’t recommend this method as much. But as a method when we don’t have the option to use the previous two options, it may be sufficient for some purposes.
Summary: Which method of adding smoke in Photoshop is best?
You could see three ways to add smoke to photoshop and see for yourself how to work with each method. Each method has its advantages and disadvantages, so we have prepared a summary for you.
Smoke brushes
+ Fast use
+ Easy to use with color
+ Up to 5000px
– May be insufficient for high resolution projects
Overall: 88%
Smoke overlays
+ Stunning quality and resolution for the highest quality projects
+ Still simple and fast enough
– Often need to mask and use color shifting
OVERALL: 90%
Photoshop creation
+ All you need is Photoshop
+ Relatively fast results
– Not very high quality
– Not very realistic looking


One Response
You just have to work more in the edits to get top quality compositions. This is better than the Photoshop or Any Ai programs which are false and needs to be tidied up at edges etc. At least this is realistic and wont affect any of the images you are working on especially RAW files. Or if you want real smoke buy smokebombs at B&Q or go out on misty days for these reuslts. Give it a real go takes time but will be worth it